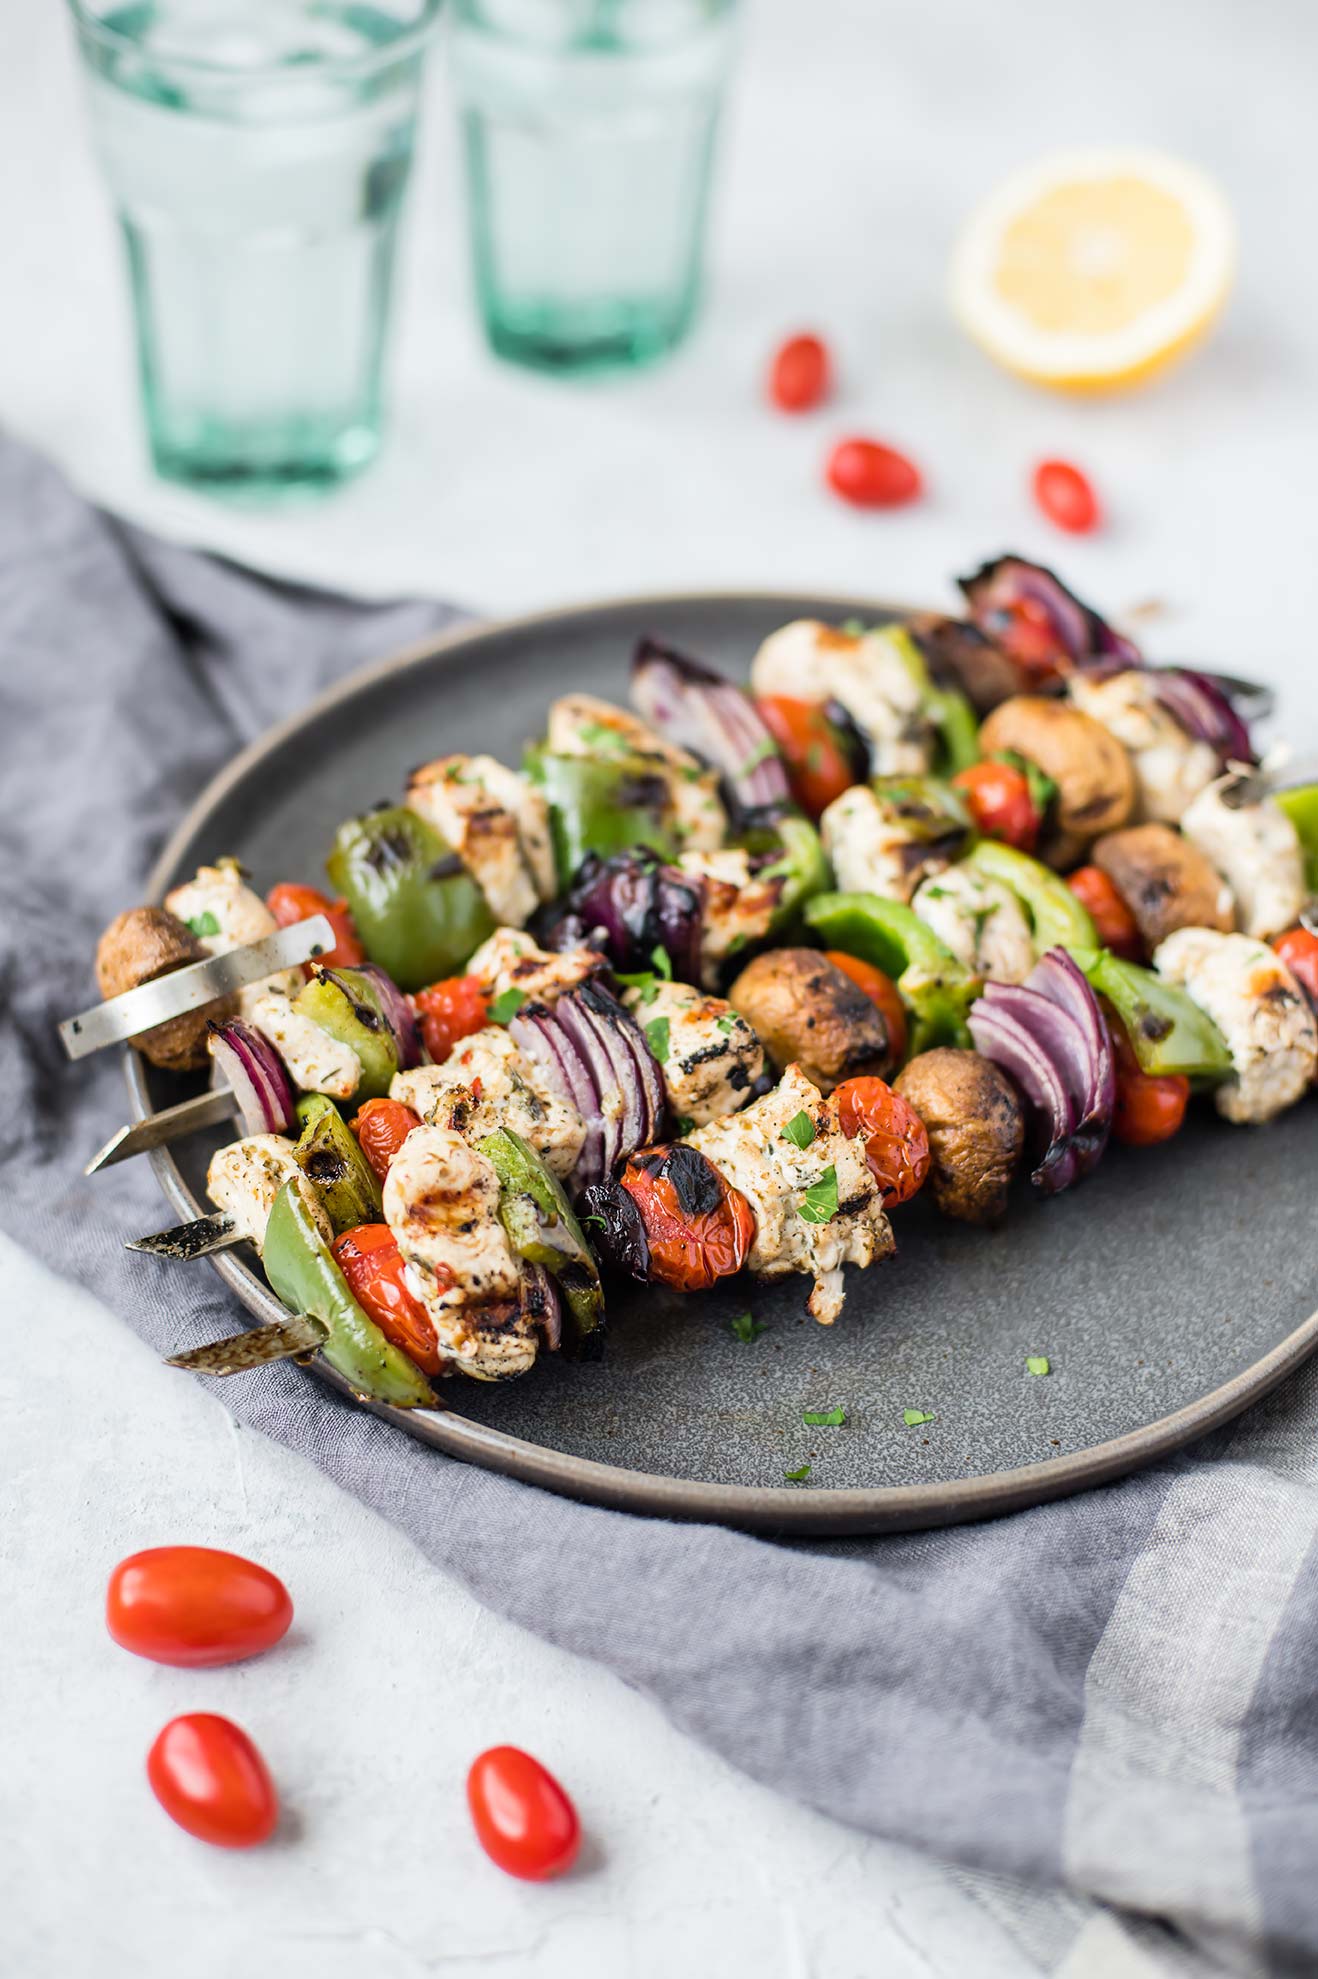
Greek Chicken Kabobs

Greek Chicken Kabobs

For the last two years, any time I’ve shot photos for blog posts I’ve done so by occupying this little 4 foot by 2-1/2 foot corner in the kitchen. It is wedged between the door to our garage, the side of a kitchen cabinet and the sliding glass door to the back yard. Other than completely blocking anyone access to the garage (or access to the house from the garage), the spot was perfect because it had good light between the hours of 8am and 3pm virtually all year ‘round, and it was conveniently located in the kitchen.

But then I started shooting videos. And oh did I learn so much! Natural light for photography is one thing — a beautiful thing - but you start shooting videos and suddenly you notice how the tiniest cloud can render one scene completely blueish. (EX: You can watch the colors of the background on this sheet pan fajitas video change throughout the whole scene. Yikes!).

So I dove in and purchased a set of “YouTuber” lights. So far I’m still learning how to use the ones I purchased (affiliate link). The light from the bulbs that came with them are a little pinker than I expected. BUT owning lights has opened up a whole new world for me — a world where I can shoot recipes outside of the hours of 9am and 3pm! And since I’m usually at work from 9-5pm, this is a BIG FREAKIN’ DEAL.

Remember that tiny corner of the kitchen I mentioned? Yes well, me and my three lights don’t fit there. At least, not with a plate of food, too. So, a few weeks ago, I made it my mission to take over our under-used office/spare bedroom and turn it into a studio. (!!!)

With the walls painted with a fresh coat of white and the closet rearranged to accommodate my photography gear, these Greek Chicken Kabobs were one of the first dishes to “test run” the new studio. All of this has given me a whole new level of motivation for house projects (I was running out of steam).

And now you’re thinking, OKAY WE GET IT but what about the kabobs?

Greek Chicken Kabobs

There are two ways to cook this mix of chicken and veggies in a lemon-oregano marinade: grilled, or baked.

Grilled, string everything onto skewers for kabobs. Roast on high until the juices run clear — about 12 minutes total, 6 on each side. You’ll get that fire-touched smokey flavor on the chicken and the onions and the tomatoes. This option is wonderful in the middle of summer, when you are out exploring (camping, at a park, at a potluck, etc), or when you just want to avoid turning on the oven.

Baked, you can skip the skewers and spread everything out on a sheet pan. Roast it all at 450°F for 15-20 minutes, until the chicken reaches an internal temperature of 165°F. On a sheet pan, the juices from the tomatoes, mushrooms, and chicken swirl together in the pan, creating a flavorful pan sauce. It makes the dish juicy which is delicious over rice. This version is best for weeknights or wintertime — when lighting the grill (or even going outside) is off the table.

In both versions, the chicken turns out super tender, thanks to the lemony marinade. That same marinade is what gives the whole dish it’s Greek-inspired flavor. They are a little spot of sunshine in the middle of a wintery week, but also perfect for summer grilling season (once that finally arrives!).

Greek Chicken Kabobs

Published January 29, 2018 by
   Print This Recipe

Serves: 6   |    Active Time: 30 minutes


Ingredients:

For the chicken:
  • Juice from 1 lemon
  • 2 tablespoons olive oil
  • 2 cloves of garlic, minced
  • 1 tablespoon dried oregano
  • 1 teaspoon dried thyme
  • 1/2 teaspoon dried rosemary
  • Sprinkle of red pepper flakes
  • 1/4 teaspoon salt
  • 1 pound chicken breast, cubed

  • For the kabobs:
  • 1 red onion, chopped into bite-sized pieces
  • 2 bell peppers, chopped into bite-sized pieces
  • 1 cup mushrooms (crimini, baby bella, or white)
  • 1 cup cherry tomatoes
  • 1/2 cup Kalamata olives
  • 1 tablespoon olive oil
  • Garnish: 2 tablespoons minced parsley

  • Directions:

    1. Marinate the chicken: in an airtight container, combine the lemon juice, olive oil, garlic, oregano, thyme, rosemary, red pepper flakes, and salt. Add chicken, and stir to combine. Close container and place in fridge for at least 4 hours (up to 24).
    2. For grilling: Light and preheat grill to high.
    3. For oven: Preheat oven to 450°F.
    4. Place chopped veggies and olives in a large bowl. Drizzle with olive oil, and stir so everything is coated.
    5. Assemble kabobs: Working with one kabob stick at a time, skewer chicken, vegetables and olives in an alternating pattern. (If you plan to roast in the oven, you can skip this step, and simply spread everything out on a sheet pan).
    6. For grilling: Place kabobs on preheated grill and reduce heat to medium-high. Grill, with the lid closed, for 6 minutes, and then turn kabobs and grill on second side for another 6 minutes. Juices should run clear and chicken should reach an internal temperature of 165°F. Remove from grill and serve hot over a bed of rice. Garnish with parsley. For oven: Place sheet pan in pre-heated oven and roast for 15-20 minutes, until chicken reaches an internal temperature of 165°F. Remove from oven and use a spatula to serve over rice. Spoon juices from pan over top. Garnish with parsley.

    Comment

    Roasted Red Pepper, Black Bean & Quinoa Breakfast Bowl

    Roasted Red Pepper, Black Bean & Quinoa Breakfast Bowl

    Leftover quinoa in the fridge? This one is for you. 😊

    I recently bought a bag full of quinoa because I wanted to try my hand at popping it (like popcorn). Popped quinoa is something that was sold roadside and in artisan markets when I visited northern Chile. It was a novelty for me — though I had eaten plenty of quinoa before, and knew it was local to the Andean region, seeing it puffed was different. Think puffed rice, but round, smaller, and with a delicious nutty flavor.

    I tried two methods for popping the grains (one stove top, one in the microwave) and neither produced the results I was looking for. The final product was like a toasted quinoa seed, which was crunchy and nutty and great on yogurt. But it wasn’t a “pop” or a “puff” by any standard. Have you popped quinoa? How did you do it? Do I need an air popper? I have dreams of a chocolate almond butter granola bar with puffed quinoa and need your help!!

    On the bright side: these experiments have meant I’ve had plenty of quinoa in the pantry.

    Roasted Red Pepper, Black Bean & Quinoa Breakfast Bowl
    Roasted Red Pepper, Black Bean & Quinoa Breakfast Bowl

    Roasted Red Pepper, Black Bean & Quinoa Breakfast Bowls have been the highlight of my quinoa-filled week.

    They are an “oooooh, yummy” and also “oh that looks nourishing” kind of dish, at the same time.

    Making these in the morning is easiest when you have leftover quinoa and already cooked (or canned) black beans to start with. You can totally cook up a fresh batch to make these bowls, but using leftovers makes this easy, and easy mornings = good. Next time you’re making quinoa, make extra with tomorrow’s breakfast in mind.

    Roasted Red Pepper, Black Bean & Quinoa Breakfast Bowl

    Roasted Red Pepper, Black Bean & Quinoa Breakfast Bowl

    Published January 24, 2019 by
       Print This Recipe

    Serves: 2   |    Active Time: 20 minutes


    Ingredients:

  • 2 eggs
  • 1 tablespoon coconut oil or other cooking oil
  • 1 red bell pepper, sliced in strips
  • 2 cups cooked quinoa, warmed
  • 1/2 cup black beans, canned or pre-cooked and strained, warmed
  • For serving: salt & pepper, sliced avocado, minced cilantro, lime wedges

  • Directions:

    1. Divide quinoa and black beans between two serving bowls.
    2. Cook the peppers: Heat cooking oil in a skillet over medium heat. When the oil glistens, tilt the pan back and forth to coat it in oil. Place red peppers in pan, and sauté, stirring every 2-3 minutes, until peppers are soft and edges are browning. Transfer peppers to serving bowls.
    3. If your pan is dry, add a bit more oil. Crack the eggs into the pan, one at a time, and reduce heat to low. Cook until whites are completely set and yolks have reached your desired doneness. Use a spatula to transfer eggs to serving bowls.
    4. Top each bowl with salt & pepper to taste, sliced avocado, minced cilantro, and a lime wedge. Serve warm.

    Comment

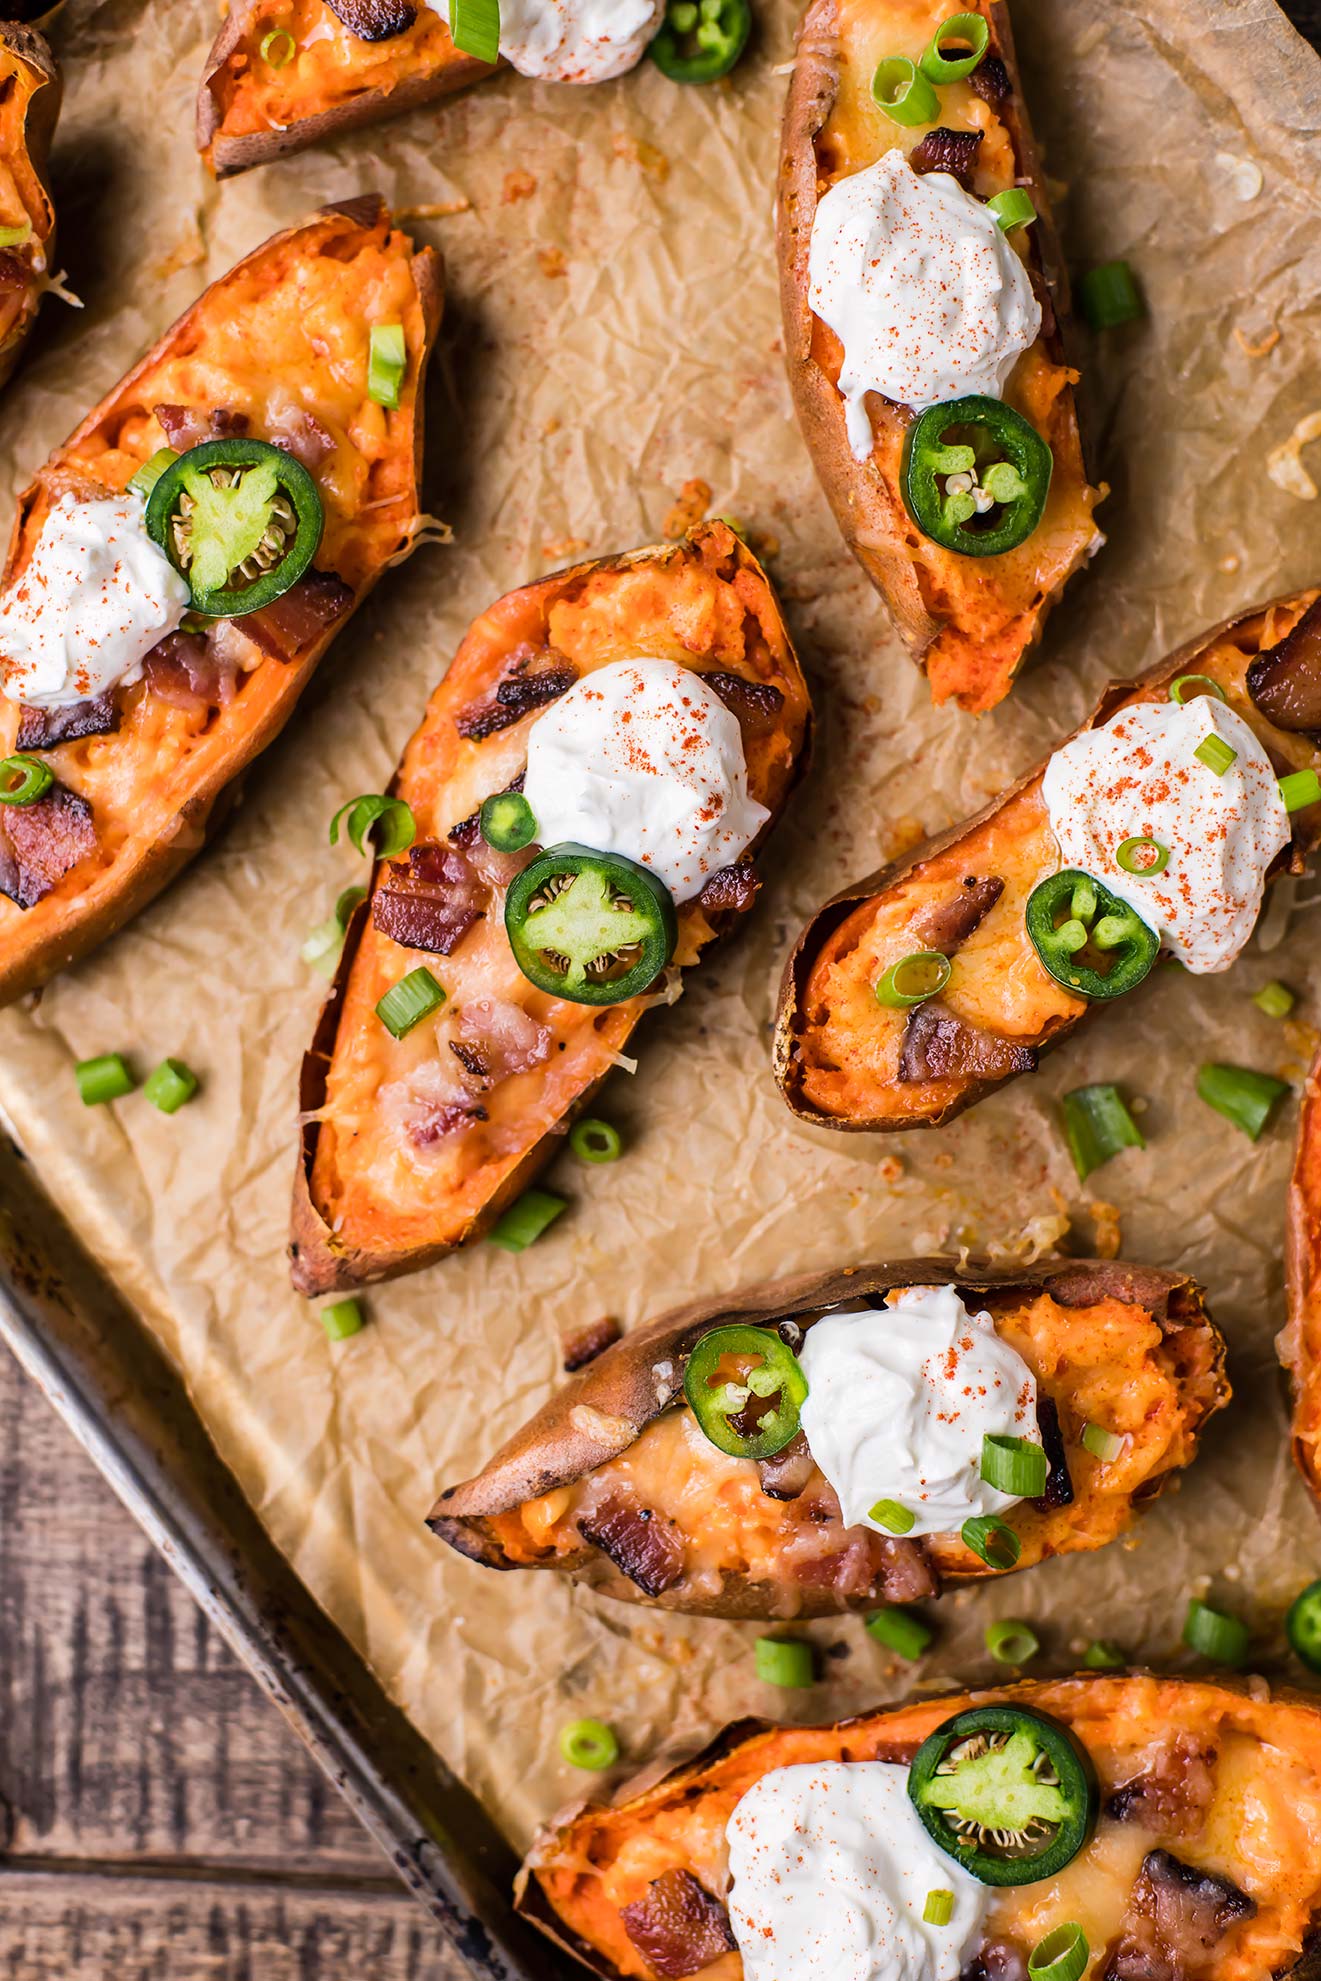
    Cheesy Bacon Sweet Potato Skins

    Cheesy Bacon Sweet Potato Skins

    These sweet potato skins, stuffed with creamy sweet potato mash and cheese and bacon, were originally created as a hooray-it's-Friday, game-day, movie-watching snack, but I'll let you in on a secret: the leftovers make a damn delicious breakfast when reheated. Whether you’re enjoying them in the morning or afternoon, it start the same way. Sweet potatoes (bake 'em up!). The soft, sweet flesh gets mashed with sour cream, which makes them ultra-creamy and flavorful.

    Toppings is where these sweet potato skins get their name -- and where it gets really delicious. First -- shredded Monterey Jack. Then, bacon pieces. I used Tender Belly Habanero Bacon which was SO good because it's just the right balance of sweet and spicy, but your favorite bacon will be perfect, no matter what it is. The potatoes go in the oven like that, just until the cheesy is extra gooey, and then get topped with fresh green onions (need a little bit of green in all of that orange! 😉), a dollop of fresh sour cream, a few slices of jalapeño (for extra zip!), and a dash of smoked paprika (which also adds nice color and flavor).

    All that's left to do is eat! 

    Cheesy Bacon Sweet Potato Skins
    Cheesy Bacon Sweet Potato Skins
    Cheesy Bacon Sweet Potato Skins

    Cheesy Bacon Sweet Potato Skins

    Published January 22, 2019 by
       Print This Recipe

    Serves: 12   |    Active Time: 1 hour


    Ingredients:

  • 6 sweet potatoes
  • 1/3 cup sour cream, plus more for topping
  • 1/2 teaspoon salt
  • 1/2 teaspoon ground black pepper
  • 1-1/2 cup shredded Monterey Jack cheese
  • 4 strips bacon, cooked and chopped into small pieces
  • 1/4 cup sliced green onions
  • Several dashes of paprika, for garnish
  • Optional: 1 jalapeño, sliced for garnish

  • Directions:

    1. Preheat oven to 400°F. Prick each sweet potato with a fork, and bake for 45-50 minutes, until sweet potatoes are soft all the way through. Allow sweet potatoes to cook 10-15 minutes, or until they are cool enough for you to handle.
    2. Slice each sweet potato in half. Use a spoon to scoop the flesh out of each potato half and into a bowl without breaking the skin of the potato (tip: leave about 1/4 inch of flesh attached to the skin, it helps keep everything together!).
    3. Mash sweet potato flesh with 1/3 cup sour cream, salt, and pepper until everything is incorporated (a few lumps are OK).
    4. Scoop mashed sweet potato into potato skins. Top with cheese and bacon bits. Place back in oven for 5-10 minutes until cheese is melted and just starting to bubble. Remove from oven, and top with green onions, a dollop of sour cream, a sprinkle of paprika, and if using, a slice or two of fresh jalapeño.
    5. Serve hot.
    Reheating leftovers: Leftovers can be reheated in a microwave (1-2 minutes, depending on microwave), toaster oven or oven (350° for 10-15 minutes, until warmed through)

    3 Comments