Roasted Eggplant with Charmoula Sauce

Roasted Eggplant with Charmoula Sauce

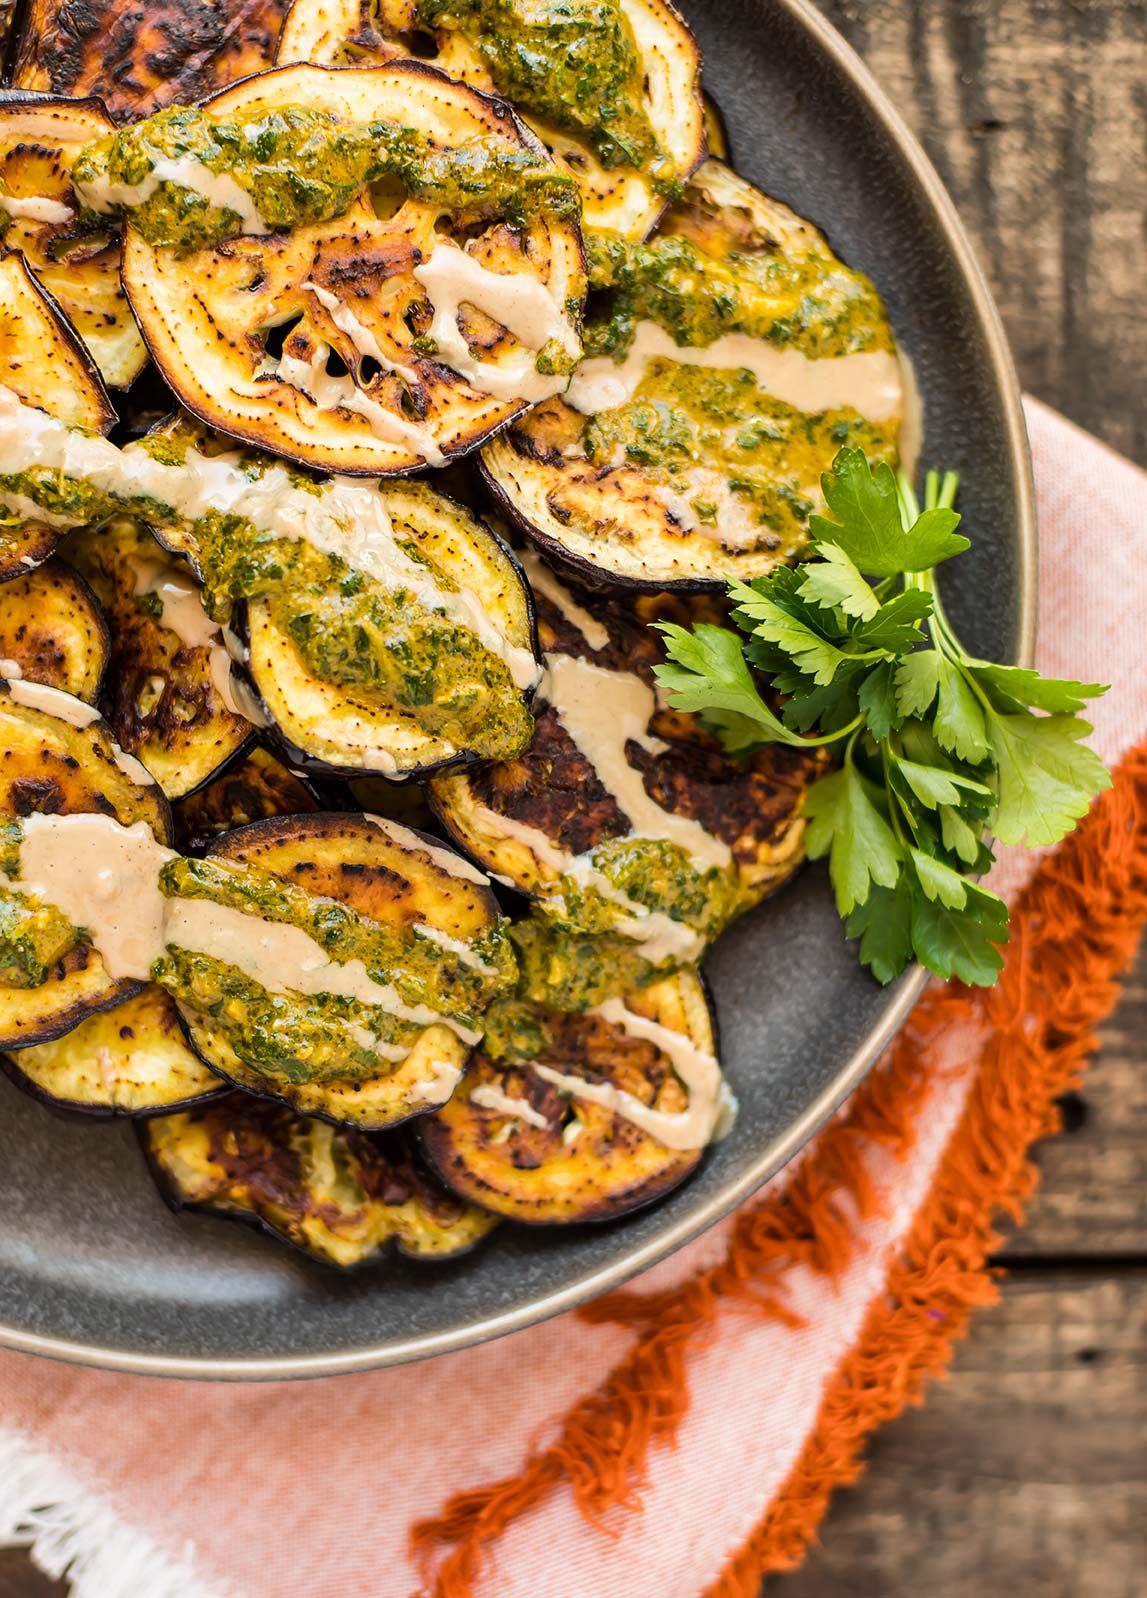
Last week, I told you all that I bought The Food of Morocco, and have been on a Moroccan food kick. The kick continues today… with this Roasted Eggplant with Charmoula Sauce. This blog post is really about the sauce, which you could use over fish, grilled meat, or roasted veggies (and don’t stop there). Or, eggplant.

It struck me, while I was adding all of the ingredients for this Charmoula to the blender, that it’s just like so many other herb-based sauces found around the world. It combines oil with an acid (lemon juice), garlic, salt, and pepper, and heaps of herbs. The process reminded me of making a South American Chimichurri, or the garlicky dipping oil used in Ecuador, or even pesto.

It is not so much their similarity that surprises me, but the idea that diverse people, strung out across the world, all arrived at a similar solution to saucing food. I’m not a historian, though a quick look at the Wiki history of Chimichurri sauce suggests it was brought over by Spanish immigrants. Were all of these sauces another way of making the flavors immigrants were familiar with in a new environment, with new ingredients? Perhaps. (I, by the way, adored this essay on how immigrants assimilate through food).

Roasted Eggplant with Charmoula Sauce

Roasted Eggplant with Charmoula Sauce

Published March 12, 2019 by
   Print This Recipe

Serves: 4   |    Active Time: 45 minutes


Ingredients:


For the charmoula:
  • 2 teaspoons ground cumin
  • 3 cloves garlic
  • 2 tablespoons extra virgin olive oil
  • 1/2 teaspoon salt
  • Juice from 1 lemon
  • 1/4 teaspoon ground paprika
  • Dash cayenne
  • 1/4 teaspoon ground black pepper
  • 1/3 cup packed cilantro leaves
  • 1/3 cup packed parsley leaves

  • For the eggplant:
  • 2 eggplants
  • 1/2-1 teaspoon salt
  • 1/3 cup olive oil
  • For serving: 1/4 cup tahini

  • Directions:

    1. Preheat oven to 450°F.
    2. Slice stem from eggplant and then cut into 1/2-inch thick rounds. Spread out on a baking sheet (or two) in a single layer. Sprinkle with salt, and allow eggplant to sit for 5-10 minutes. The salt with help reduce bitterness.
    3. Brush eggplant with olive oil. Flip eggplant and brush the second side. Place in oven and bake 30-35 minutes, until eggplant is soft all the way through, and is golden/brown on the edges.
    4. While eggplant cooks, combine all ingredients for charmoula in a food processor or blender, and pulse until a sauce forms. I like my sauce to still have some texture to it, so I stop before everything is puréed, but this is just my preference.
    5. Serve: place roasted eggplant on a plate, and drizzle with several spoonfuls of charmoula and several spoonfuls of tahini. Eat warm.
    6. Note: you will likely have leftover charmoula, which can be used as a sauce for fish, or grilled meats and vegetables.

    Comment

    Greek Chicken Kabobs

    Greek Chicken Kabobs

    For the last two years, any time I’ve shot photos for blog posts I’ve done so by occupying this little 4 foot by 2-1/2 foot corner in the kitchen. It is wedged between the door to our garage, the side of a kitchen cabinet and the sliding glass door to the back yard. Other than completely blocking anyone access to the garage (or access to the house from the garage), the spot was perfect because it had good light between the hours of 8am and 3pm virtually all year ‘round, and it was conveniently located in the kitchen.

    But then I started shooting videos. And oh did I learn so much! Natural light for photography is one thing — a beautiful thing - but you start shooting videos and suddenly you notice how the tiniest cloud can render one scene completely blueish. (EX: You can watch the colors of the background on this sheet pan fajitas video change throughout the whole scene. Yikes!).

    So I dove in and purchased a set of “YouTuber” lights. So far I’m still learning how to use the ones I purchased (affiliate link). The light from the bulbs that came with them are a little pinker than I expected. BUT owning lights has opened up a whole new world for me — a world where I can shoot recipes outside of the hours of 9am and 3pm! And since I’m usually at work from 9-5pm, this is a BIG FREAKIN’ DEAL.

    Remember that tiny corner of the kitchen I mentioned? Yes well, me and my three lights don’t fit there. At least, not with a plate of food, too. So, a few weeks ago, I made it my mission to take over our under-used office/spare bedroom and turn it into a studio. (!!!)

    With the walls painted with a fresh coat of white and the closet rearranged to accommodate my photography gear, these Greek Chicken Kabobs were one of the first dishes to “test run” the new studio. All of this has given me a whole new level of motivation for house projects (I was running out of steam).

    And now you’re thinking, OKAY WE GET IT but what about the kabobs?

    Greek Chicken Kabobs
    Greek Chicken Kabobs

    There are two ways to cook this mix of chicken and veggies in a lemon-oregano marinade: grilled, or baked.

    Grilled, string everything onto skewers for kabobs. Roast on high until the juices run clear — about 12 minutes total, 6 on each side. You’ll get that fire-touched smokey flavor on the chicken and the onions and the tomatoes. This option is wonderful in the middle of summer, when you are out exploring (camping, at a park, at a potluck, etc), or when you just want to avoid turning on the oven.

    Baked, you can skip the skewers and spread everything out on a sheet pan. Roast it all at 450°F for 15-20 minutes, until the chicken reaches an internal temperature of 165°F. On a sheet pan, the juices from the tomatoes, mushrooms, and chicken swirl together in the pan, creating a flavorful pan sauce. It makes the dish juicy which is delicious over rice. This version is best for weeknights or wintertime — when lighting the grill (or even going outside) is off the table.

    In both versions, the chicken turns out super tender, thanks to the lemony marinade. That same marinade is what gives the whole dish it’s Greek-inspired flavor. They are a little spot of sunshine in the middle of a wintery week, but also perfect for summer grilling season (once that finally arrives!).

    Greek Chicken Kabobs

    Published January 29, 2018 by
       Print This Recipe

    Serves: 6   |    Active Time: 30 minutes


    Ingredients:

    For the chicken:
  • Juice from 1 lemon
  • 2 tablespoons olive oil
  • 2 cloves of garlic, minced
  • 1 tablespoon dried oregano
  • 1 teaspoon dried thyme
  • 1/2 teaspoon dried rosemary
  • Sprinkle of red pepper flakes
  • 1/4 teaspoon salt
  • 1 pound chicken breast, cubed

  • For the kabobs:
  • 1 red onion, chopped into bite-sized pieces
  • 2 bell peppers, chopped into bite-sized pieces
  • 1 cup mushrooms (crimini, baby bella, or white)
  • 1 cup cherry tomatoes
  • 1/2 cup Kalamata olives
  • 1 tablespoon olive oil
  • Garnish: 2 tablespoons minced parsley

  • Directions:

    1. Marinate the chicken: in an airtight container, combine the lemon juice, olive oil, garlic, oregano, thyme, rosemary, red pepper flakes, and salt. Add chicken, and stir to combine. Close container and place in fridge for at least 4 hours (up to 24).
    2. For grilling: Light and preheat grill to high.
    3. For oven: Preheat oven to 450°F.
    4. Place chopped veggies and olives in a large bowl. Drizzle with olive oil, and stir so everything is coated.
    5. Assemble kabobs: Working with one kabob stick at a time, skewer chicken, vegetables and olives in an alternating pattern. (If you plan to roast in the oven, you can skip this step, and simply spread everything out on a sheet pan).
    6. For grilling: Place kabobs on preheated grill and reduce heat to medium-high. Grill, with the lid closed, for 6 minutes, and then turn kabobs and grill on second side for another 6 minutes. Juices should run clear and chicken should reach an internal temperature of 165°F. Remove from grill and serve hot over a bed of rice. Garnish with parsley. For oven: Place sheet pan in pre-heated oven and roast for 15-20 minutes, until chicken reaches an internal temperature of 165°F. Remove from oven and use a spatula to serve over rice. Spoon juices from pan over top. Garnish with parsley.

    Comment

    Chorizo & Egg Breakfast Tacos

    Chorizo & Egg Breakfast Tacos

    It started with a business trip to Texas in 2016. It was my first real business trip. My co-worker (Libby, who is somewhat of an aviation food connoisseur) asked if I wanted to stop by Root Down, a restaurant in the terminal. We got sweet potato fries with curry sauce and I realized that whatever I had previously thought about airport food was wrong. (Fruit cups, low fat yogurt, and granola bars? Move aside!)

    Fast forward to 2017: I’m traveling to Ecuador for a client. I had been on a few business trips since that one to Texas, but none as cool as this one — Ecuador! South America! Hadn’t I graduated with a Spanish Degree just for this?! Going into Marketing I had pretty much thought those international opportunities were behind me. Anyhow, I was on my own, so the world was my oyster and the schedule was whatever I said it was. Which means there was time to stop at Root Down, and breakfast was in order. I sat at a table for one with a view of the tarmac and ordered tacos. In that moment I felt awkward by myself, and took solace in those tacos, taking my sweet time. Each taco was small — made on a 4-inch tortilla - and stuffed with greasy chorizo and fluffy scrambled eggs.

    My next encounter with those tacos was this August. It was 6am as we rode the bus to the airport, and by the time we made it to security our stomachs rumbled for breakfast. It was Oliver’s idea, that day, to stop at Root Down but of course I didn’t protest. We both ordered the tacos and coffee and finally, digging into our breakfast, we were on vacation.

    Chorizo & Egg Breakfast Tacos

    This taco recipe is my home rendition: chorizo crumbles, scrambled eggs, fresh cilantro, tomatoes, and queso fresco. I replaced the pickled red onions with minced fresh red onions that star on Root Down’s menu, because at home it’s easier (and I like the fresh flavor). And added avocado, because we weren’t going to make tacos without avocado.

    When you make these, it might be easier to just cook up an entire pound of chorizo versus the exact amount you need. It will store well in your fridge, and can go into future meals (great in soups!) or make it easier for you to get breakfast going tomorrow. You could also plan to serve a crowd: make a breakfast taco bar!

    Maybe it’s just nostalgia, but these tacos for breakfast feel a bit like a vacation. Enjoy!

    Chorizo & Egg Breakfast Tacos

    Chorizo & Egg Breakfast Tacos

    Published November 8, 2018 by
       Print This Recipe

    Yield: 3   |    Active Time: 30 minutes


    Ingredients:

  • 6 six-inch corn tortillas
  • 4 eggs
  • 1/4 teaspoon salt
  • 1/4 teaspoon ground black pepper
  • 1 teaspoon coconut oil
  • 1/2 cup chorizo crumbles, cooked and heated
  • 1 Roma tomato, diced
  • 1/2 an avocado, sliced
  • 1/4 cup queso fresco crumbles
  • 1 tablespoon minced red onion
  • 2 tablespoon minced cilantro
  • Optional: hot sauce of choice, to taste
  • Optional, for serving: lime wedges

  • Directions:

    1. Prep your ingredients first in this recipe, as once the eggs are cooked, you’ll want to immediately start assembling your tacos. So, dice that tomato, slice the avocado, and mince the cilantro and red onion now. Reheat or cook the chorizo.
    2. Warm the tortillas. There are plenty of ways you can get this done: place them in a preheated oven for a few minutes, warm them in a toaster oven, or heat them in a dry skillet. Whatever you do, watch them closely so as to avoid burning them or drying them out too much. Just a few minutes will do.
    3. Now, crack eggs into a medium sized mixing bowl. Add salt and pepper and whisk until they are a creamy yellow color and slightly frothy.
    4. Heat coconut oil over medium heat in a 10-inch skillet. When oil sizzles, pour in eggs. As eggs begin to set (it will take a minute or two), use a wooden spatula, to pull the eggs across the pan, stirring them. Continue until no visible liquid egg white remains, and then move the pan off the heat. (Tip: If there are other things to do or prepare, I sometimes will pull the pan from the heat a little bit early, say 30 seconds, to avoid over cooked eggs. They will continue to cook in the pan until you serve them.)
    5. Assemble tacos: take tortillas out of the toaster, and top each with a heaping tablespoonful of chorizo. Divide egg mixture evenly amongst tortillas, and then top each with diced tomato, a slice of avocado, queso fresco, minced red onion, and cilantro.
    6. Serve hot with hot sauce on the side, and lime wedges if using.

    Comment