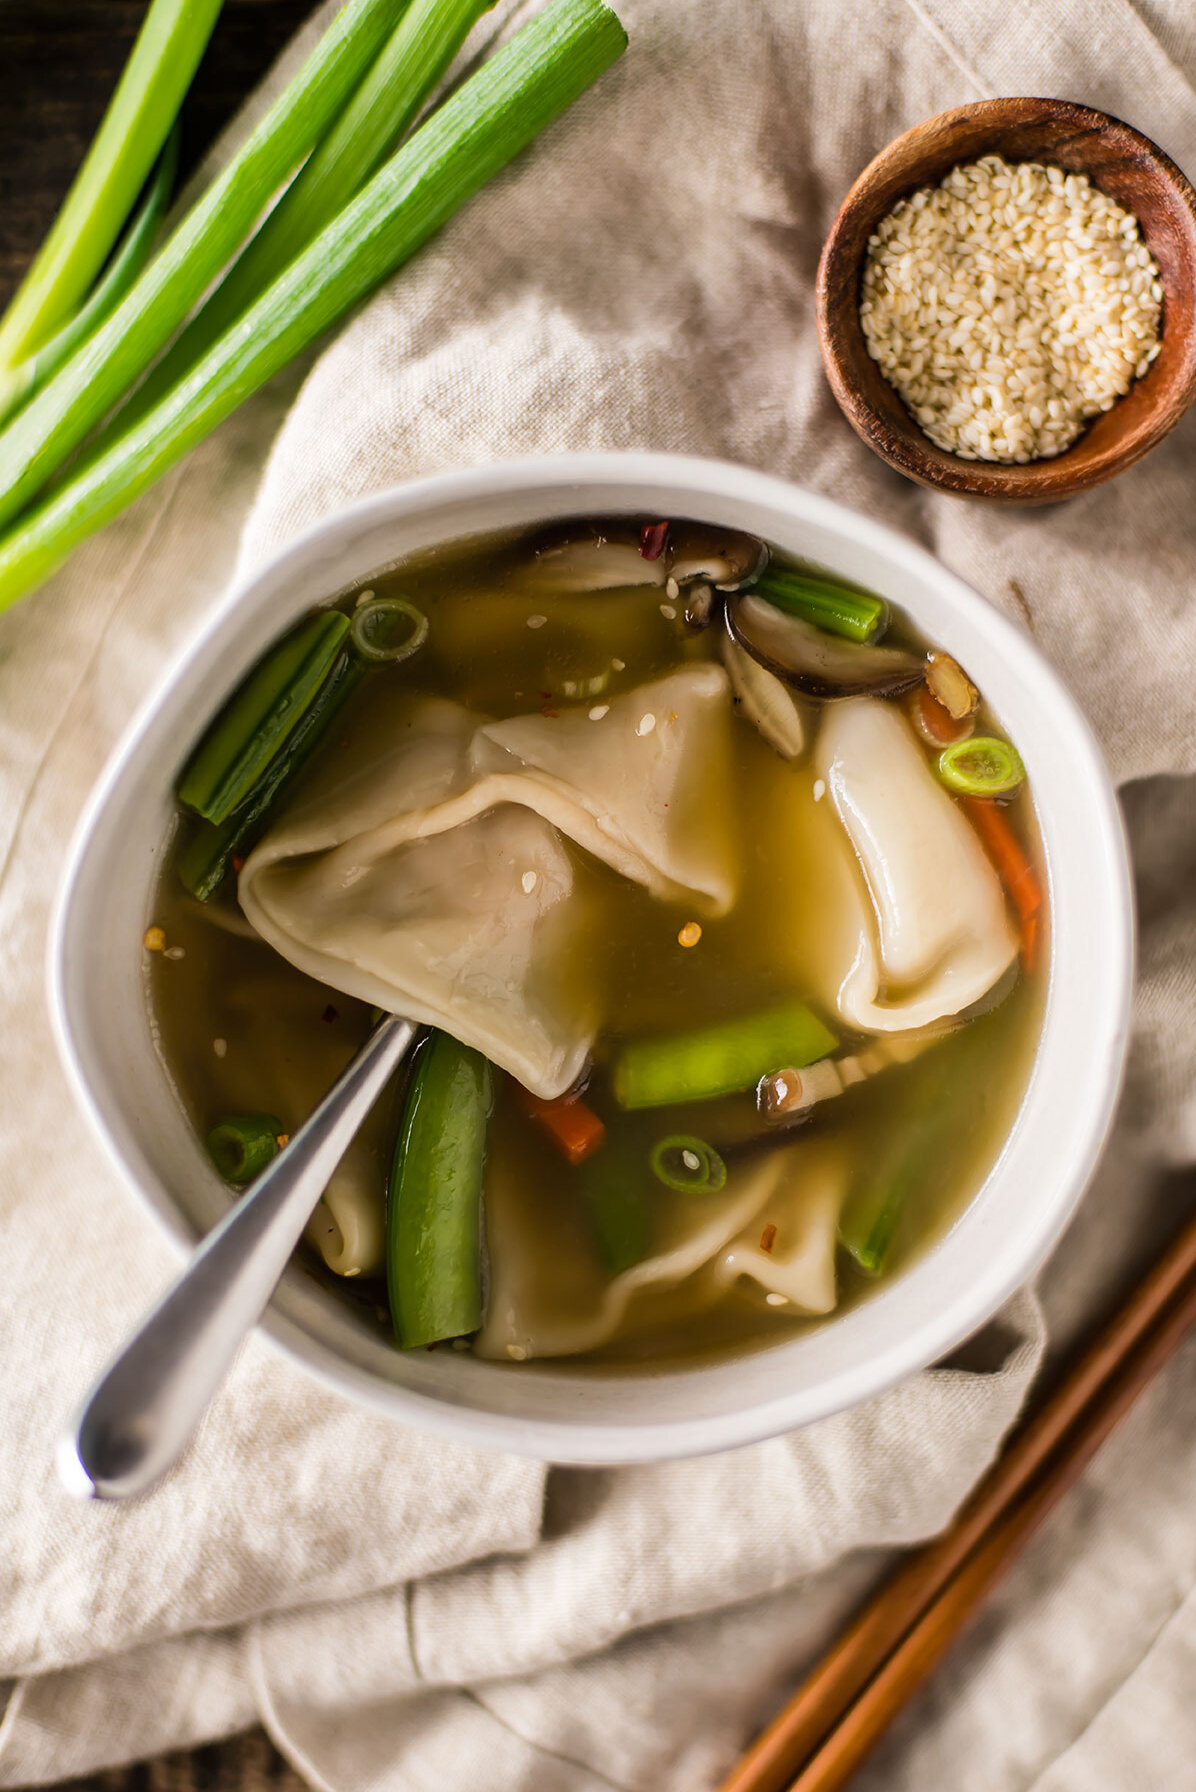
Wontons in Gingery Broth

Wontons in Gingery Broth

Happy New Year! We do not have any New Year’s Eve (or day) traditions, though I’d like to make this soup a repeating occurrence.

For many, cooking is purely functional—a thing you do so you can eat. If you’re in that boat, this soup might seem like far too much work, as it asks you to make not just the soup base but also the wontons. For me, cooking an activity in itself, almost—if not more—as enjoyable than the eating. If you’re a let’s-cook-something-interesting DIY-type, this recipe is right up your alley. I admit to one shortcut that I always take: buying wonton wrapper dough. You can find wonton wrappers in the freezer aisle of most Asian Markets (try H Mart or Pacific Ocean).

Making little wontons is fun (they’re cute!) and the soup is fantastic. Any day off from work (even just a standard Sunday) is perfect for this recipe.

Wontons in Gingery Broth

Wontons in Gingery Broth

Published January 7, 2020 by
   Print This Recipe

Serves: 6   |    Active Time: 70 minutes


Ingredients:

For the Broth:
  • 8 cups chicken broth
  • 2 green onions, roots and white parts removed
  • 1 inch of ginger, cut into thin slices (coin shapes)
  • 3 cloves garlic

  • For the Wontons:
  • 1/2 pound ground chicken, turkey or pork
  • 2 green onions, roots and dark green parts removed, then minced
  • 1 inch ginger, grated on microplane
  • 2 cloves garlic, minced
  • 1/8 teaspoon salt
  • 2 tablespoon sesame oil
  • 2 tablespoons soy sauce
  • 1/16 teaspoon ground black pepper
  • 1 package (30-40 count) soup wonton wrappers, thawed (you can find these frozen at most Asian Markets)

  • For the Soup:
  • 1 cup snow peas
  • 1 cup shiitake mushrooms
  • 1 carrot, cut into matchsticks
  • Salt, to taste
  • For garnish: 2 green onions, sliced
  • For garnish: 1-2 tablespoons toasted sesame seeds for garnish
  • For garnish: Red chili flakes

  • Directions:

    1. Prepare the wonton filling: In a medium-sized mixing bowl, combine ground chicken with the minced green onion, garlic, and grated ginger. Add salt, sesame oil, soy sauce, and ground black pepper. Mix until ingredients are well distributed.
    2. Assemble wontons: Prepare your work station by setting up a clean work surface (I use my counter, you can also use piece of parchment paper), and filling a medium-sized bowl with 2 cups of cold water (this will be used for sealing wontons). Working in batches, lay several wonton wrappers out flat on your work surface. Scoop 1 teaspoon of filling into center of wonton wrappers. Be careful not to overfill the wontons, as they will not seal properly. Using a finger dipped in your bowl of cold water, lightly dampen the edges of the wonton wrapper. You need just enough water to get the dough to stick. Now, fold the wontons (see image above as reference): Fold the bottom right corner up to meet the top left corner, creating a triangle. Press the edges with your fingers to seal the wonton. Then, fold the top-right corner of the triangle into the middle of the wonton, followed by the bottom-left corner, using a drop of water to make them stick. Place wontons in a large container with lid (ie., a pyrex or Tupperware). Repeat this step until the wonton filling is all used up. Place lid on container, and set in fridge until ready to use (Can be made in advance and refrigerated for up to 3 hours).
    3. Prepare the gingery broth: Pour broth into a large soup pot. Add green onions, ginger slices, and whole garlic cloves. Cover, and bring to a simmer for 15-20 minutes to develop flavor. Then, using a slotted spoon, remove garlic, ginger, and green onions from broth and discard.
    4. Assemble soup: Slice the shiitake mushrooms, and remove and discarding the stems. Place mushrooms in the soup and bring to a simmer. Cook for 1-2 minutes. Add the carrots, and then working one at at time, carefully lower the wontons into the soup with a slotted spoon. Gently stir occasionally to prevent the wontons from sticking to the bottom of the pot. Once all wontons are in, bring the soup back to a gentle simmer and cook for another 2 minutes, until wontons have floated to the top. Add snow peas to the soup, stirring gently. Cook for 1 more minute, until snow peas are bright green and tender. Taste broth, and season with salt as needed. Remove pot from heat.
    5. Serve: Label soup into bowls, and top with sliced green onions, toasted sesame seeds, and red chili flakes to taste. Enjoy hot!

    Wontons in Gingery Broth
    Comment

    Chorizo, Black Bean + Corn Stuffed Poblano Peppers

    Chorizo, Black Bean + Corn Stuffed Poblano Peppers

    “Disaster” is not the right word for how poorly my chile rellenos con queso turned out, but it didn’t go well. I harvested six Big Jim peppers from the garden and stuffed them with corn, onions and cheese. They got battered and tossed into a pan to deep fry. Sounds good so far, right? I thought so, too.

    The problem is with what comes next — how I never learn my lesson with frying. With frying, you can’t skimp by using just one inch of oil in a skillet. You have to go all out. You have to commit to a full pot of blazing hot oil which you’ll likely have to toss afterwards. Otherwise, whatever you were frying will touch the bottom of the pan and stick (Yes, even to that ceramic-enamel “non stick” pan you have… Trust me, I would know). The result is typically a pile of whatever you were frying (i.e., peppers) and several hunks of fried batter stuck to the bottom of the pan. I usually try to scrape that batter up. By this time it has turned brown, crispy and greasy. And that will be that: a pile of peppers, and a pile of fried batter bits. It’s delicious, so I suppose it’s not a complete failure. It just isn’t what it’s supposed to be.

    This recipe for stuffed poblanos avoids that conundrum all together. The peppers aren’t even battered, which might initially seem like a disappointment until it’s Thursday at 5:30pm and you’re the one cooking dinner. One less dish, no sputtering pot of oil, and hey — maybe your arteries will thank you, too. 😉Stuffed with chorizo, corn, and black beans, these peppers feel like harvest. Whether you make your own enchilada sauce or not, the dish comes out of the oven looking vibrant and artisan, even after you pile on the grated pepper jack. That’s what I call success!

    Chorizo, Black Bean + Corn Stuffed Poblano Peppers
    Chorizo, Black Bean + Corn Stuffed Poblano Peppers
    Chorizo, Black Bean + Corn Stuffed Poblano Peppers

    Chorizo, Black Bean + Corn Stuffed Poblano Peppers

    Published September 27, 2018 by
       Print This Recipe

    Serves: 8   |    Active Time: 60 minutes


    Ingredients:

  • 8 poblano peppers
  • 1/2 pound ground chorizo
  • 2 cloves garlic, minced
  • 1 cup corn kernels (frozen and thawed or fresh)
  • 1 16-oz can black beans, drained and rinsed
  • 2 cups red enchilada sauce
  • 1 cup shredded pepper jack cheese

  • Directions:

    1. Before you begin: Whenever you are cooking with peppers or chilies, remember that their oils will stay on your fingers. Avoid touching your face (an especially your eyes!) until you are done cooking and have thoroughly washed your hands with soap and water. (Some choose to wear gloves while working with chilies. I find poblanos are not so hot that I need this — but do whatever is best for you.)
    2. Preheat the oven to 425°F.
    3. Brown the meat: heat a skillet over medium heat and cook, stirring to brown all sides and breaking into small crumbles with a spatula. Add the garlic while the meat is cooking.
    4. Once the meat is browned, add the corn and black beans to the pan. Stir so everything is evenly distributed. Turn off heat.
    5. Prepare peppers: cut a vertical slice down each pepper, from the stem to the tip. Near the top of each pepper, cut a 2-3 inch horizontal slice, creating a T-shape. If you would like, use a paring knife to remove the seeds and white pith from the pepper now. This will help tone down the spice of the pepper. We leave them in.
    6. Prepare your baking dish: spread the enchilada sauce in an even layer on the bottom of a 9x13 inch baking dish.
    7. Stuff the peppers: gently stuff the chorizo mixture into each pepper, and then place the peppers in the baking dish. Be careful, the mixture may still be hot! If so, let it cool down so you can handle it with out burning yourself.
    8. Bake for 35 minutes, and then top with shredded cheese. Bake for 5 minutes more and then remove from oven and serve hot.

    4 Comments

    Layered Summer Ratatouille

    Summery Ratatouille

    Continuing with the theme of recipes that use up all of your summer produce: Ratatouille! 

    Admittedly my garden has been very slow to produce this year probably due to the hailstorm in mid-June, but I’m guessing most of you don’t have that problem, so you’ll be able to make use of this recipe soon!

    Is there a more beautiful way to display summer produce than a ratatouille? An array of color, layers of vegetables. And it's really quite simple to make, easier than pie! Easier than it looks — that’s for sure. 

    So what is ratatouille? There are two different versions: one where all the vegetables are stewed together, and this one, where delicate rounds of tomatoes, zucchini, summer squash, and eggplant are arranged over an herby tomato sauce. That’s it! From there you can customize: add protein to the sauce, top with fresh cheese or herbs, you name it.

    Summery Ratatouille
    Summery Ratatouille

    I served this version over Ina Garten's Parmesan polenta and OMG... I don’t think I’ve ever had such delicious polenta. I wouldn’t call it healthy or anything of that nature. But it is soooo good! And goes perfectly well with this ratatouille, rounding out the meal.

    Can you believe it’s August already? Where has the time gone?! 

    Summery Ratatouille

    Layered Summer Ratatouille

    Published August 2, 2018 by
       Print This Recipe

    Serves: 4   |    Active Time: 70 minutes


    Ingredients:

  • 4 ounces tomato paste
  • 1 zucchini
  • 1 summer squash
  • 1 skinny eggplant
  • 3 roma tomatoes
  • 1 bell pepper, any color
  • 1/8 teaspoon onion powder
  • 1/8 teaspoon garlic powder
  • 1/4 teaspoon dried oregano
  • 1/4 teaspoon dried thyme
  • 1/4 teaspoon dried basil, or 1/2 teaspoon minced fresh basil
  • 1 tablespoon olive oil or avocado oil
  • 1/8 teaspoon salt
  • 1/8 teaspoon ground black pepper
  • For serving: minced fresh basil, shredded parmesan.
  • Optional: if you would like to add protein to this recipe, 1 cup of cooked hot Italian sausage crumbles.

  • Directions:

    1. Preheat oven to 375°F.
    2. In the bottom of a 9x9inch baking dish, spread the tomato paste in an even layer. Sprinkle with onion powder, garlic powder, oregano, thyme, and basil. If you are using the sausage, spread crumbles over tomato paste layer at this time.
    3. Slice the zucchini, summer squash, tomatoes, and bell pepper into thin rounds. Arrange the rounds in overlapping rows over the tomato paste layer. Brush with oil, and then season with salt & pepper.
    4. Bake for 50 minutes, until veggies are softened through an golden on the edges. Top with minced fresh bail and shredded parmesan. Serve hot.

    8 Comments