Red Chili Enchilada Sauce

Red Chili Enchilada Sauce

This is a bit of a teaser for what’s to come on Thursday — for simplicity sake, I wanted to break out the instructions for the sauce and another recipe (plus, there are plenty of ways to use this sauce!). And no… enchiladas are not on the docket! (Though that reminds me I should make some enchiladas soon). In any case, my lips are sealed. You’ll see Thursday’s recipe soon enough!

I first “dared” to make my own enchilada sauce while I was working in a restaurant in college. I was not the saucier, or anything close to it — more like waitress that occasionally helped with some baking - but when I was baking, I would watch the happenings of the kitchen while I slowly stirred a caramel, weighed flours, or chilled dough. It just so happened that my station was right next to the saucier, and that is what gave me the confidence to make this sauce.

Red Chili Enchilada Sauce

First, I realized that the marvelous sauce that was used for braising pork was as simple as puréeing some select ingredients in the blender — and then, I realized that said sauce was pretty darn close to enchilada sauce. I did a little bit of reading and next thing you know I was blending enchilada sauce every week (even without the blender lid on one time… but we’ll save that messy story for another time).

You can use this sauce for oh so many more things than enchiladas (though using it in these leftover turkey enchiladas is perfect). In fact, I started using it to braise beef (Oofta! That recipe is old — please forgive those grainy photos. Oh what a difference three years makes), but now I’m much more into making enchilada casseroles or huevos rancheros with salsa rojo.

Sauce is the start of many a great dish. More sauce! If any of you have ever watched Chopped, you know the judges are always talking about sauce, and with good reason. 😋

Red Chili Enchilada Sauce

Red Chili Enchilada Sauce

Published September 25, 2018 by
   Print This Recipe

Serves: 2 cups   |    Active Time: 20 minutes


Ingredients:

  • 1 yellow onion, diced
  • 2 cloves garlic, minced
  • 1 teaspoon coconut oil
  • 1 sixteen-oz can of diced tomatoes
  • 1/2 cup broth (chicken, beef or veggie)
  • 1/4 cup chili powder
  • 1 teaspoon ground cumin
  • 1 teaspoon ground coriander
  • 1/2 teaspoon salt
  • 1/4 teaspoon cracked pepper

  • Directions:

    1. Heat coconut oil over medium-high heat in a skillet on the stove. When the oil glistens, add onion and garlic and sauté until onions are transparent and starting to brown. Remove from heat.
    2. In a blender (I use a Blendtec - affiliate link!), combine onions and garlic, diced tomatoes, broth, chili powder, cumin, coriander, salt, and pepper. Secure lid on blender and purée.
    3. Use sauce immediately or store in an air-tight container in the fridge for up to a week.

    2 Comments

    Cinnamon Pecan Almond Butter

    Cinnamon Pecan Almond Butter

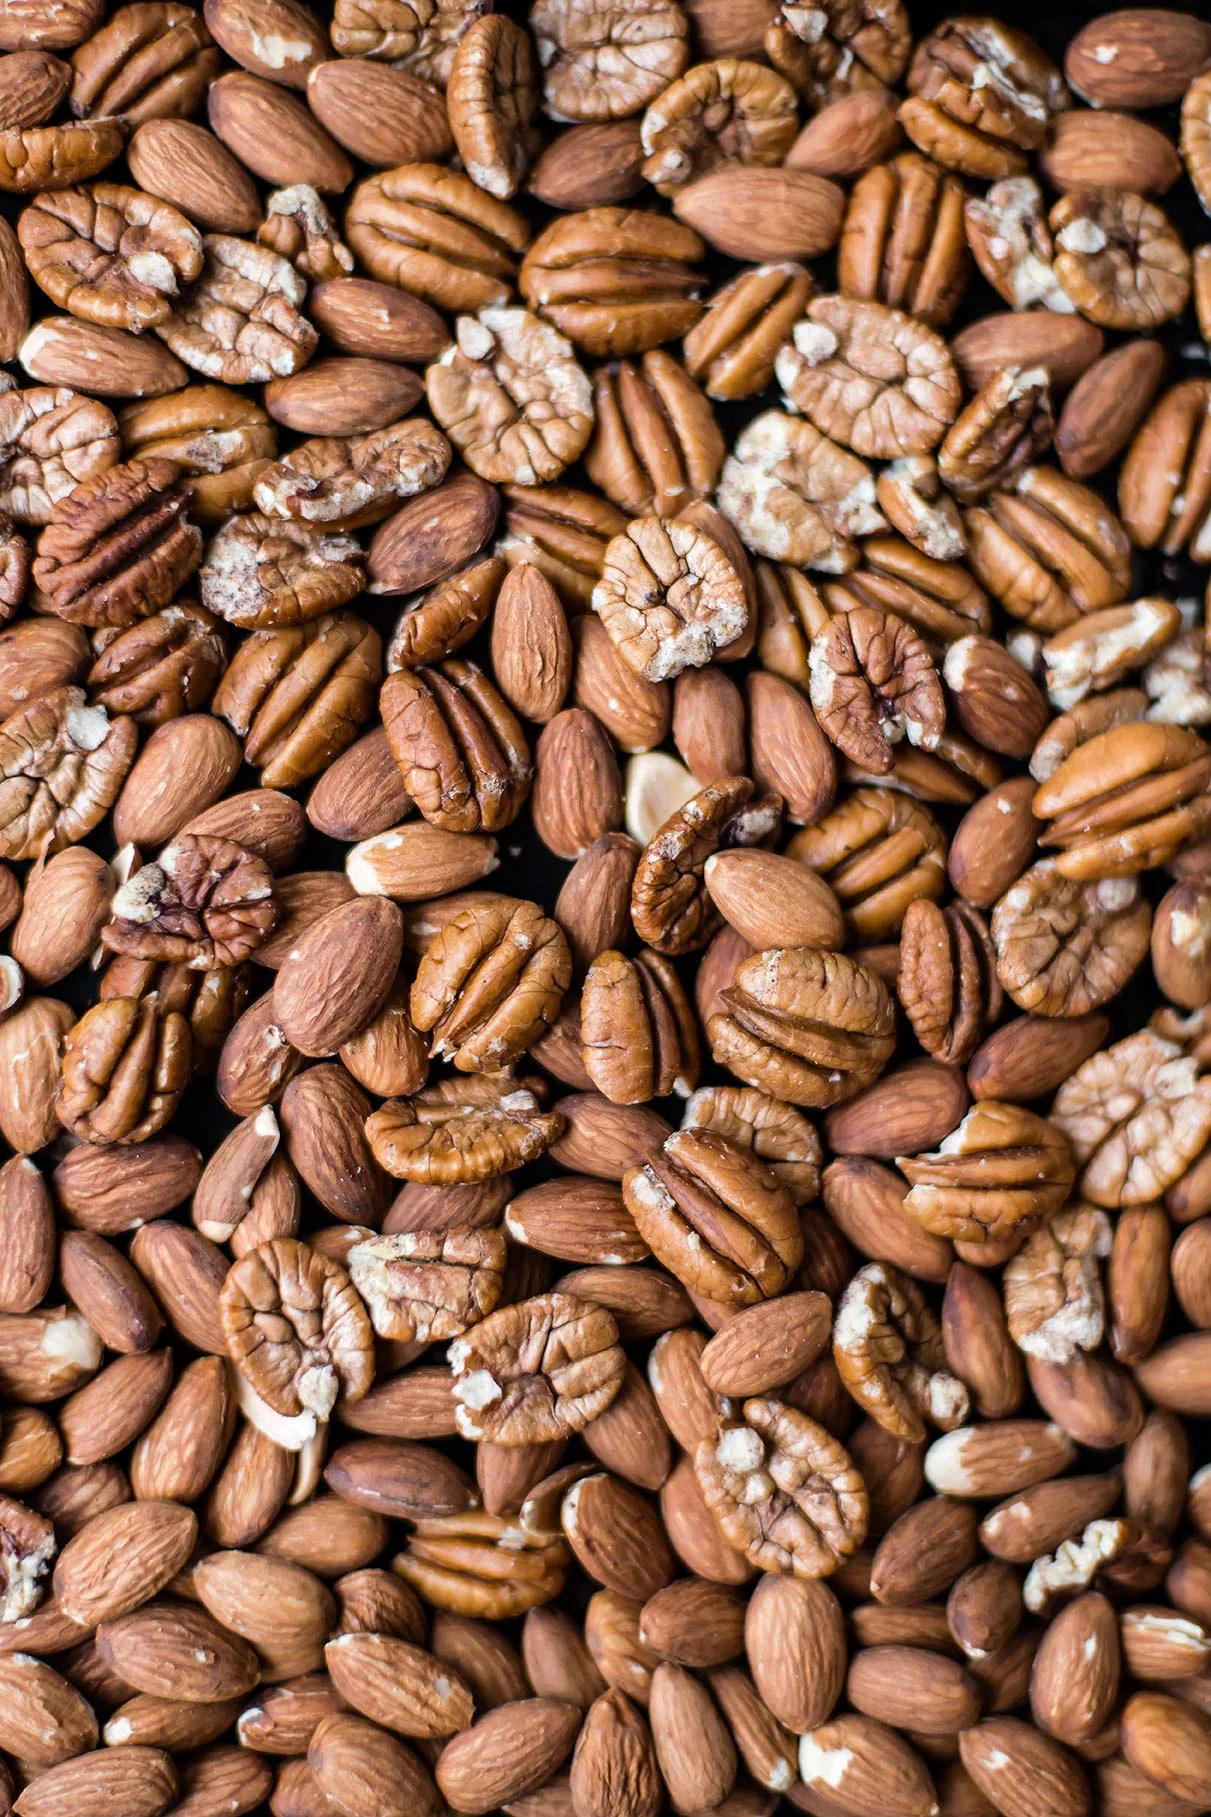
    Almonds, pecans, and a dash of cinnamon. That's it: three ingredients is all you need to make this lusciously smooth nut butter, one that is far superior than anything you'll find in a store. And it's not just superior because you're left with a victorious sense of "I made that!" ... it's seriously creamy, with a flavor that leaves you wanting the whole jar for dessert.

    Some almond butters are thick: they stick to the top of your mouth and clump up when spread on toast. This is not one of those almond butters. Thanks to the addition of pecans, which are naturally buttery, this almond butter is smooth and creamy.

    Pecans have a natural sweetness which sometimes tastes a bit like caramel to me. (If you're as big of a food nerd as I am, maybe you'll appreciate this report I found on different varieties of pecans and their tasting notes.) 

    Cinnamon Pecan Almond Butter
    Cinnamon Pecan Almond Butter

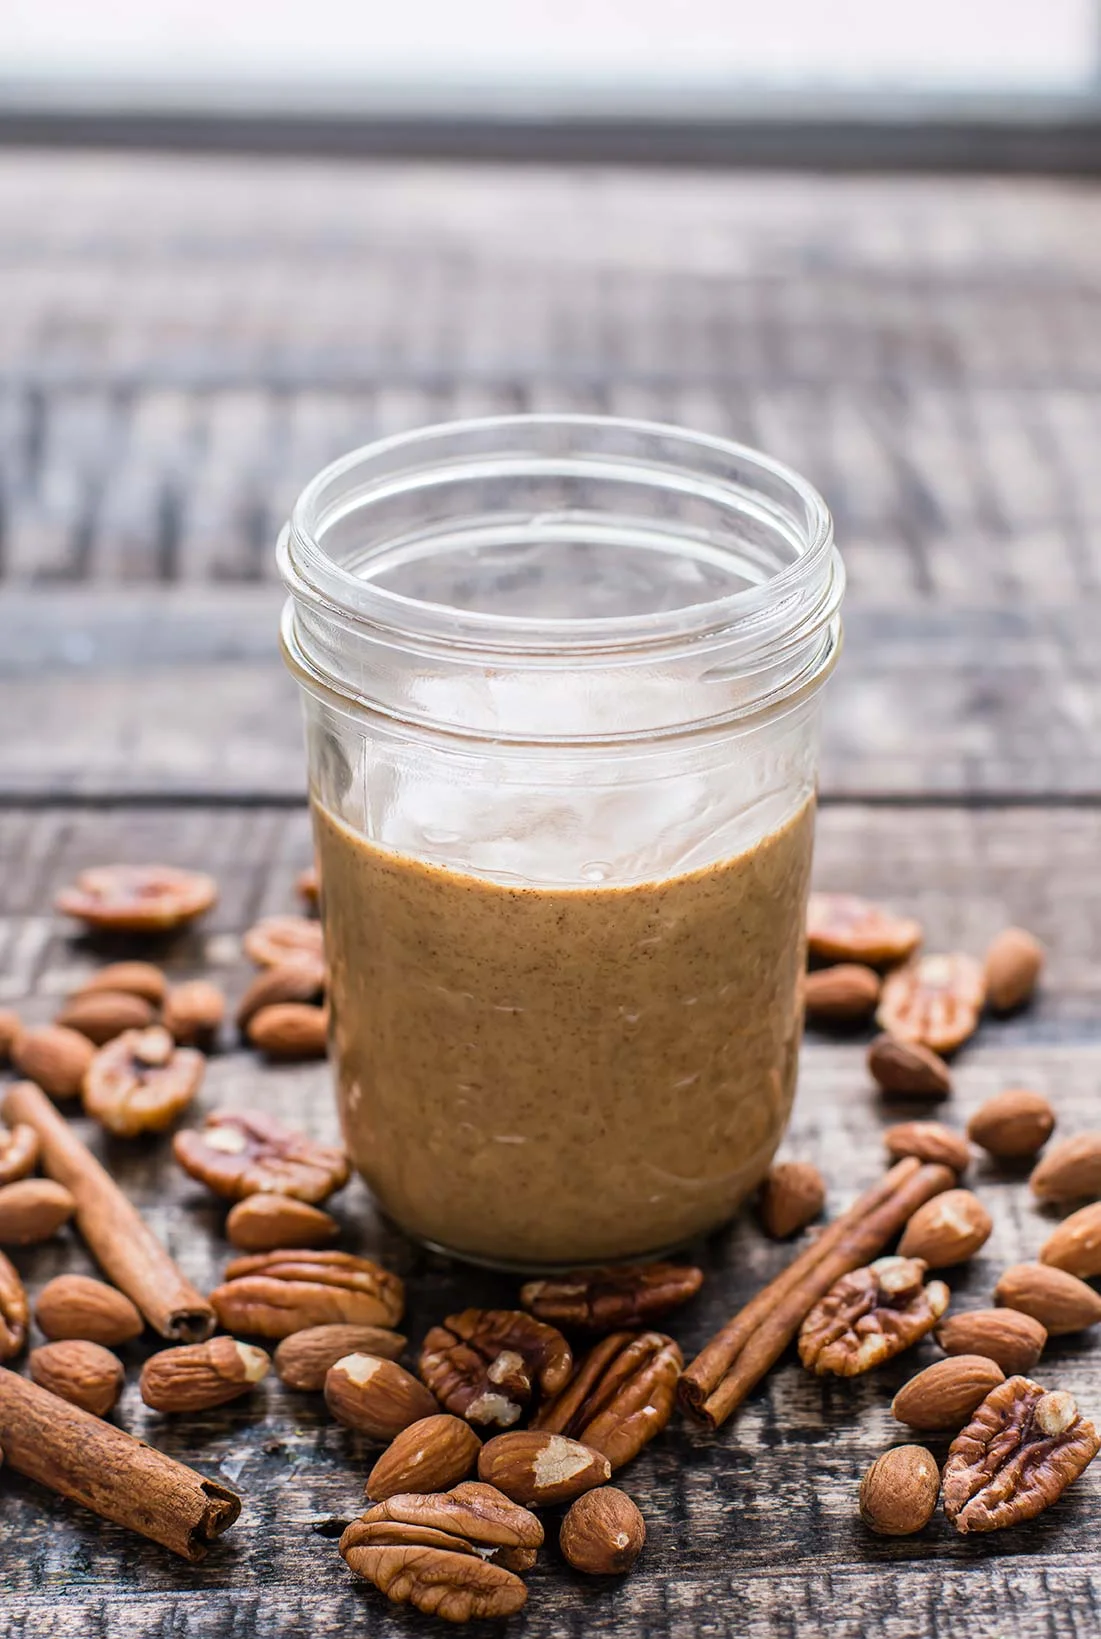
    That caramelly taste is paired perfectly with a touch of cinnamon -- which is also naturally sweet - and the whole trio goes amazing well on a sliced apple (the combo is reminiscent of apple pie), a banana (I have long had "caramel banana crepes" on my list of recipes to create, but spreading nut butter on a banana is far easier), toast, oatmeal...I could go on... and don't forget straight from a spoon!

    And the magic is all in those pecans. 

    So why even bother with adding almonds? Well, they're cheaper for one. And that texture we were talking about before actually helps out here: pecan butter can be a runny when it's just pecans. Almonds balance that out.

    So, there you have it: dreamy, creamy, caramelly cinnamon pecan almond butter. Eat up! 

    Cinnamon Pecan Almond Butter
    Cinnamon Pecan Almond Butter

    Cinnamon Pecan Almond Butter

    Published June 5, 2018 by
       |     Print This Recipe

    Yields: ~1-1/2 cups nut butter   |    Total Time: 20 minutes


    Ingredients:

  • 220g almonds 
  • 150g pecans 
  • 1/2 teaspoon cinnamon

  • Directions:

    1. Preheat oven to 350°F. Spread pecans and almonds out in a single layer on a sheet pan, and place in oven for about 5 minutes, until nuts are fragrant and golden. Side aside to cool for about 15 minutes.
    2. Place nuts and cinnamon in a high-powered blender. I use a Blendtec with the Twister Jar because the lid also scrapes the sides as you go (affiliate link). Place lid on blender and blend on high (or work your way up to speed 10), blending for a minute at a time, and then turning the blender off to scrape the sides. Repeat this process until the nut butter is smooth and velvety. Note: If you place the nuts in while they are still hot, they will get even hotter in the blender — you may see steam in the blender. If you do, let the nut butter cool off before you taste it to avoid burning your tongue!
    3. Scrape nut butter into a jar with an air-tight lid. Great on apples, bananas, toast, or by the spoonful!

    Comment

    Immune Boost Green Juice

    Immune Boost Green Juice

    I’m not much of a juicer. Never have been. I’ve always been a little down on what I see as a glorified consumption of sugar. That might sound a little harsh, and I admit that it is. But more often than not I’d rather drink a smoothie with all of its fiber, or just eat a piece of goddamn fruit.

    But, last week, there I was. I felt a tickle in my throat. Oliver had just finished reading me a news story about how the flu was out of control this year. And I decided I needed a boost. Green juice.

    Have you been there? The “please, please, please don’t let me get sick,“ feeling? That’s what this juice is for.

    Immune Boost Green Juice

    It is SUPER high in Vitamins C, A and K. Like nature’s Emergen-C! But, 100% natural.

    I drank that green juice down (and loved it, citrusy, with a touch of ginger). The next morning, The tickle at my throat was gone, but two days later Oliver complained of a sore throat too, so there I was again making green juice again--the same green juice I had made for myself just a few days before.

    Now, I’m still not that into juice. You'll find no recommendations on juice cleanses here. But this juice is like a multipurpose vitamin... like an insurance policy. You drink it with a wholesome breakfast and you get all those extra vitamin packed in.

    So far, I'm still flu free: maybe it had something to do with this juice, or maybe not. Either way, I fell in love with green juice somewhere along the way. At least this green juice. The insurance policy.

    Vitamin Boost Green Juice

    Immune Boost Green Juice

    Published February 8, 2018 by
       |     Print This Recipe

    Serves: 2   |    Total Time: 10 minutes


    Ingredients:

    • 2 leaves of dino (lacinato) kale
    • 1/2 cup sliced cucumber
    • 1 lemon, peel sliced off
    • 1 blood orange, peel sliced off 
    • 1 and 1/2 apple, cored and roughly chopped
    • 1 inch ginger
    • 1 cup water
    • 6 ice cubes, for serving 

    Directions:

    1. Place ingredients in a high powered blender: first the kale and then the cucumber, lemon and orange, apple, ginger, and water.
    2. Purée until smooth (I use a BlendTec (affiliate link!), and set the blender to the “Whole Juice” setting).
    3. Place a nut milk bag (affiliate link!) over a bowl or wide-mouthed jar, and pour purée through the nut milk bag to strain out the pulp.
    4. Optional: If you like, stir back in a tablespoon or two of the pulp.
    5. Divide ice cubes between serving glasses and pour juice over ice. Serve.

    Comment