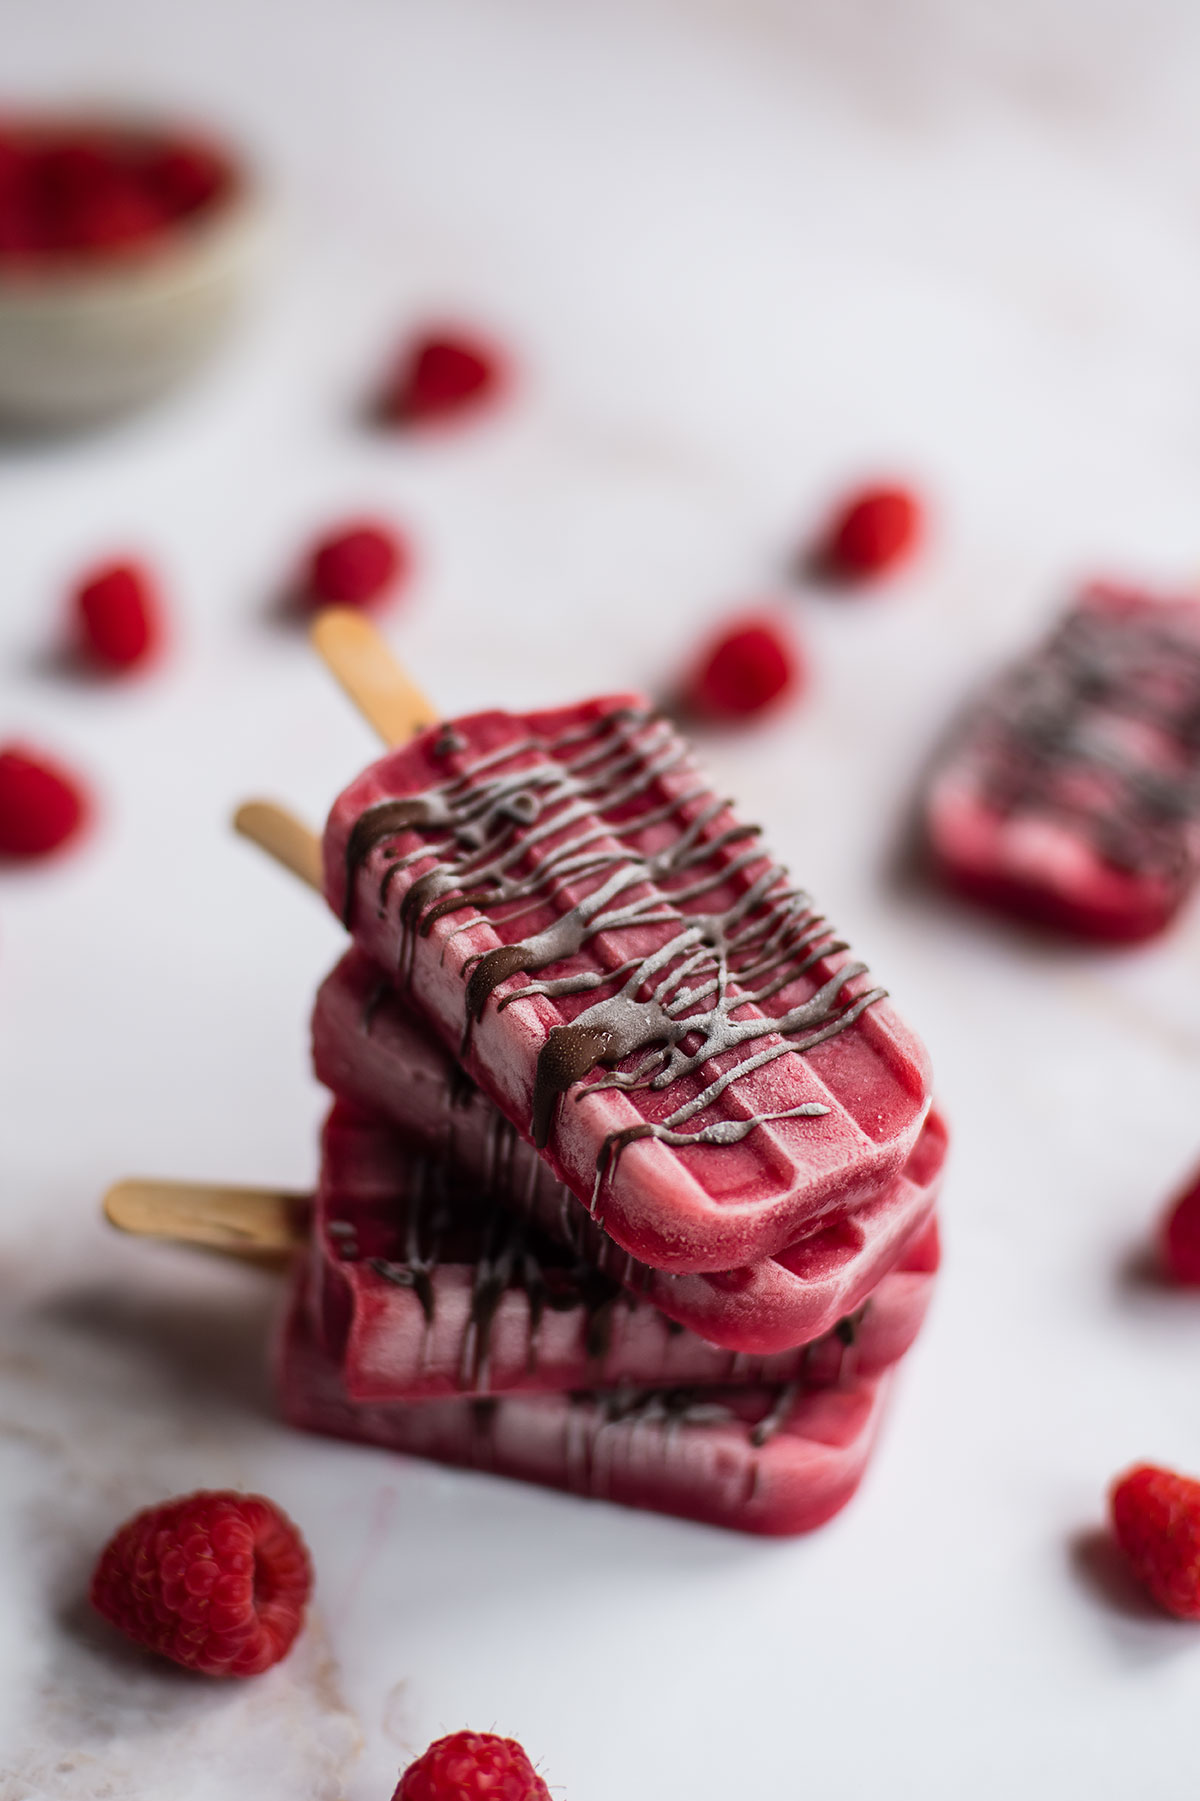
Raspberry Popsicles with Dark Chocolate Drizzle
/
Poison ivy and raspberry bushes—when I was a kid, these were the two plants my dad always pointed out to me on camping trips. This summer, as we hiked through Big Elk Meadows (which is not a meadow and there were no elk), the wild raspberries were copious. The dry creek was spotted with small bushes, each of them ripe with red gems. Those wild berries were far better than the ones growing in my own backyard, and not just because we were eating them outside. They were juicier and sweeter. We ate the ripest ones and left the others for the birds.
These popsicles are an end of summer hoorah! A sweet-tart cool down for mid-afternoon.

Raspberry Popsicles with Dark Chocolate Drizzle
Published September 10, 2019 by
Serves: 6 | Active Time: 20 active minutes
Ingredients:
Directions:
- Place raspberries in a blender and purée.
- Place a fine-mesh sieve over a sauce pan, and pour raspberry puree through sieve in order to remove seeds. All of the juice should go through the sieve (into the pot), and you should be left with just seeds in the sieve. Discard of seeds.
- Place raspberry purée on stove over low heat and stir in lemon juice. Bring to a slow simmer, and add sugar to taste. Stir until sugar is completely dissolved. Allow mixture to cool, about 10 minutes.
- Pour raspberry mixture into popsicle molds with popsicle sticks and freeze for 8 hours, until frozen solid.
- When popsicles are frozen, prep the chocolate: melt chocolate in microwave (at 30 second increments, stirring in between each until smooth), or in a double boiler.
- Remove popsicles from molds, and drizzle with chocolate. Allow chocolate to set. Serve immediately, or store in air-tight container until ready to eat.