Green Chile & Pepper Jack Cheese Quiche

Green Chile & Cheese Quiche

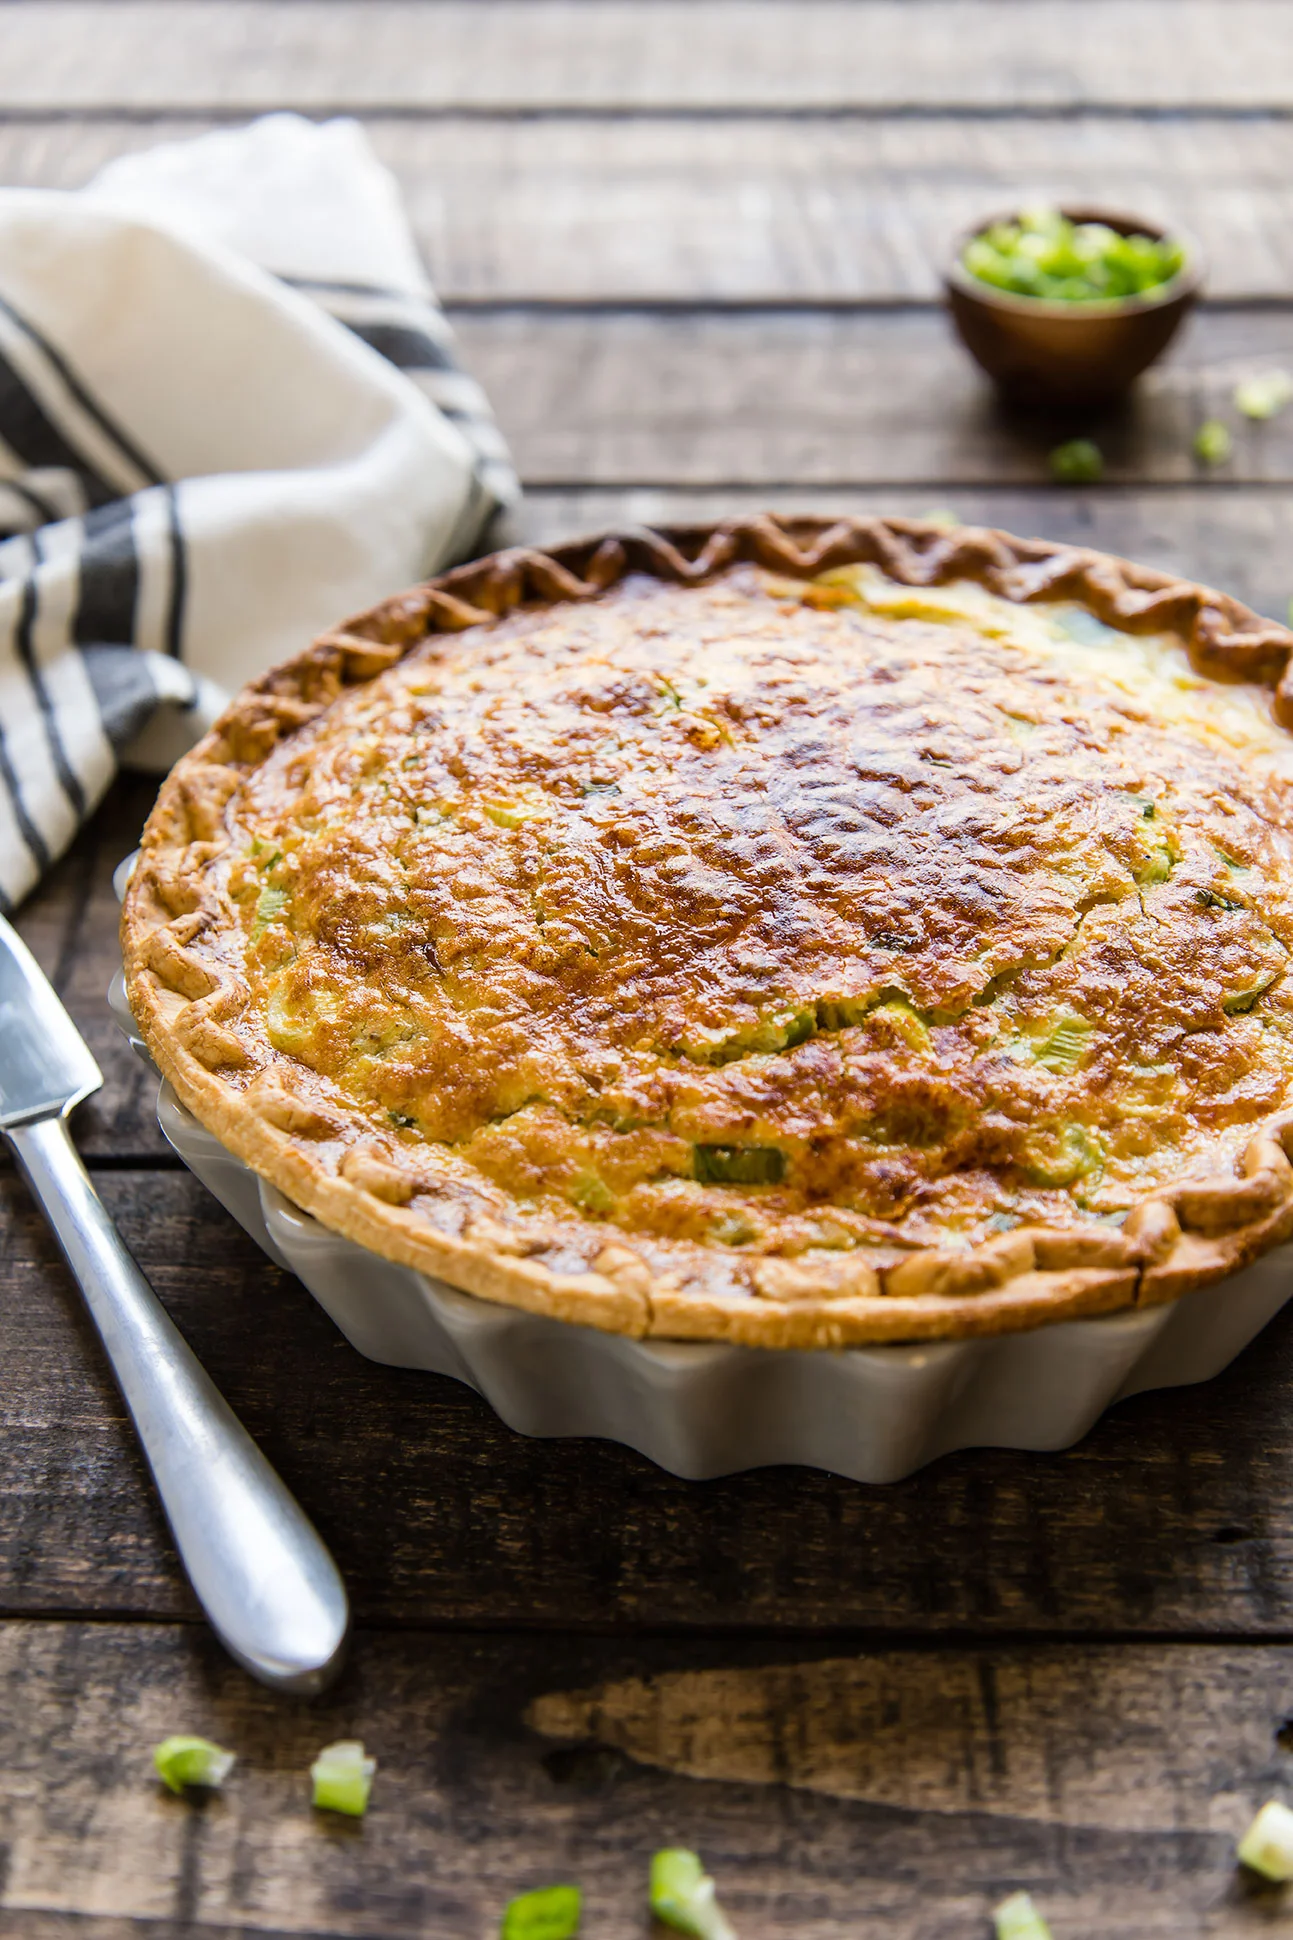
When you need a make ahead breakfast or lunch, quiche is the way to go. This one is the epitome of ease. The only thing you have to chop is green onions, and I certainly won’t tell if you use a store-bought pie crust (as long as you don’t tell anyone that I did that, too 😉).

I am a big fan of green chiles—as a stew, stuffed, or otherwise. I almost always have a can of roasted green chiles in the pantry, but you could also use freshly roasted or even frozen (and thawed) green chiles. They taste very summery, though many recipes using them feel wintery (like stew). This quiche, on the other hand, doesn’t really care what season it is. Serve with a simple side salad to make a complete lunch.

Green Chile & Cheese Quiche

Green Chile & Pepper Jack Cheese Quiche

Published June 19, 2019 by
   Print This Recipe

Serves: 6-8   |    Active Time: 60 minutes


Ingredients:

  • 1 deep-dish pie crust 
  • 5 eggs
  • 1/2 cup heavy cream
  • 1 cup shredded pepper jack cheese
  • 1 4-oz can green chiles 
  • 2 green onions, white and dark green parts removed
  • 1/4 teaspoon ground black pepper 
  • 1/4 teaspoon salt
  • 2 dashes paprika, plus more for topping 

  • Directions:

    1. Bake pie crust according to directions.
    2. Meanwhile, whisk together eggs and cream in a large bowl until frothy. Add cheese and green chiles. Chop the green onion, and add to egg mixture. Add salt, pepper, and two dashes of paprika and stir to combine.
    3. Pour egg mixture into prepared pie crust. Sprinkle top of pie with a dash of paprika.
    4. Bake quiche at 400°F for 25-35 minutes, until center of quiche has puffed, and the filling is set. Note: if the edges of your crust are browning too quickly, you can cover them using thin strips of foil (leave the quiche filling uncovered).
    5. Allow quiche to cool 10 minutes before slicing.
    6. Store leftovers in an airtight container in the fridge.

    Comment

    Gluten-Free Banana Nut Snacking Cake

    Gluten-Free Banana Nut Snacking Cake
    Gluten-Free Banana Nut Snacking Cake

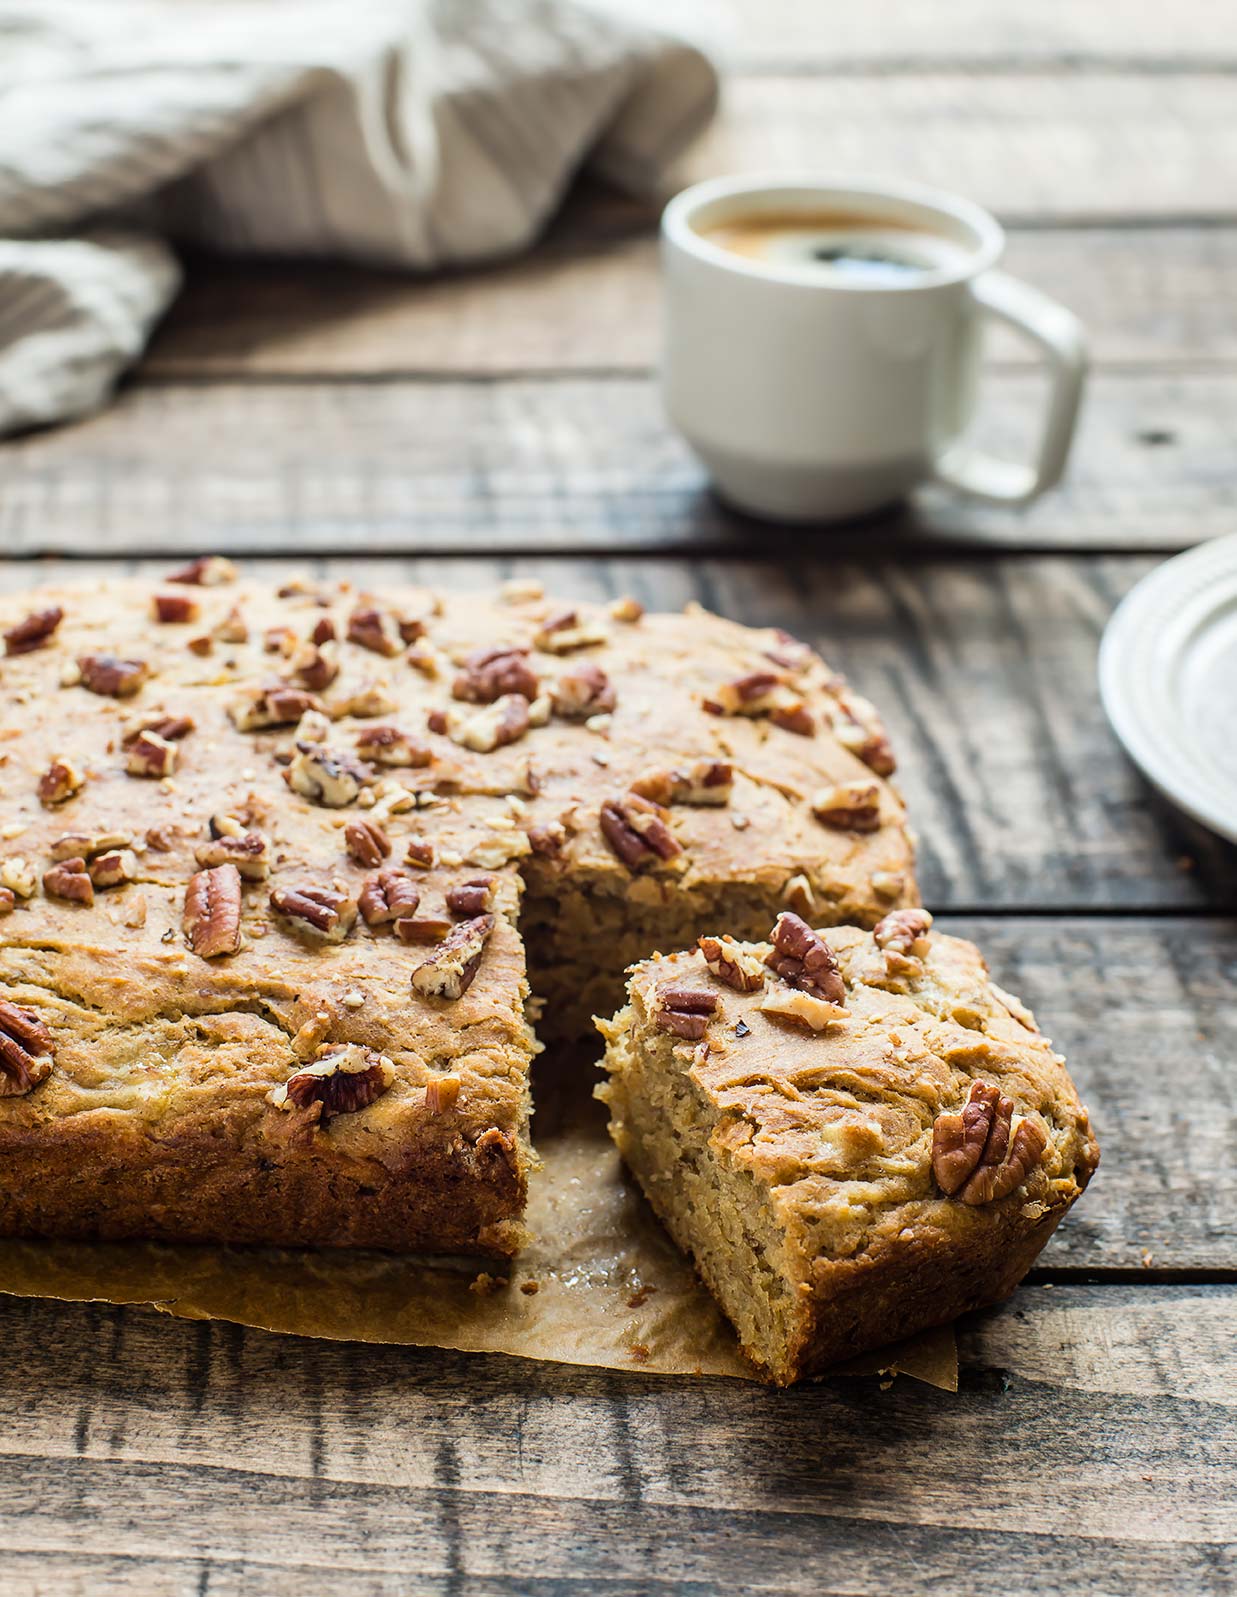
    This recipe for banana pecan cake stemmed from a well-loved recipe on the New York Times.

    Following recipes has never been my style—I’m guess many of you are the same way. I like to have an outline, but then I go from there: Frosting? Hmm, too much sugar for an afternoon snack for me. Will this work with a gluten-free flour blend? Let’s give it a shot. Ingredient by ingredient I swap in and swap out. This is how I like to navigate a kitchen, and I find, when I follow my gut, I like the output more.

    Everyone has unique tastes and preferences. It’s for that reason that I hope everyone will do some tweaking and twisting while they prep their dinners. It’s for their own good! There have been countless times when I followed a recipe to a “T” and later regretted it, wishing I had swerved in a different direction.

    Gluten-Free Banana Nut Snacking Cake
    Gluten-Free Banana Nut Snacking Cake

    Gluten-Free Banana Nut Snacking Cake

    Published April 16, 2019 by
       Print This Recipe

    Serves: 9   |    Active Time: 50 minutes


    Ingredients:

  • 1/2 cup butter melted
  • 1/3 cup light brown sugar or coconut sugar
  • 1 cup mashed ripe banana (2-3 bananas) 
  • 2 large eggs 
  • 1/4 cup greek yogurt 
  • 1 teaspoon vanilla extract
  • 1 1/2 cups measure for measure gluten-free flour blend (I used Bob's Red Mill Gluten Free 1-to-1 Baking Flour (affiliatel ink))
  • 3/4 teaspoon baking soda 
  • 1/2 teaspoon salt 
  • Optional- 1/4 cup pecan pieces

  • Directions:

    1. Preheat oven to 350°F and fit a 9 inch square baking dish with parchment paper.
    2. In a medium mixing bowl, cream together the butter, sugar, banana, eggs, yogurt, and vanilla extract using an electric mixer.
    3. Add flour, salt, and baking soda and blend until a uniform batter forms.
    4. Spread batter in an even layer in the prepared baking dish. Sprinkle with pecan pieces.
    5. Bake for 25-30 minutes, or until a toothpick, inserted into the middle, comes out clean.
    6. Allow to cool 10 minutes, then lift from baking dish and slice into squares. Serve.

    Comment

    Soft & Chewy Flourless Ginger Tahini Cookies

    Soft & Chewy Ginger Tahini Cookies

    In January, well after holiday season was over, a client sent a big box of Tate's Cookies to the office, where they filled the kitchen counter for half a week. It was the worst (but also the best) kind of way to kick off January. I had been wanted to make a gingery version of these tahini chocolate chip cookies for some time -- I even had made a batch over the holidays that didn't quite work out. Despite it being peak resolution season, that counter full of cookies was just the push I needed to dive back into recipe development. 

    The dream: a chewy, rich, flourless ginger cookie with chunks of crystallized ginger. 

    I knew that tahini would be the perfect base, but my first attempt used far too much molasses and the cookies were WAY too soft. I learned, on that attempt, that coconut sugar really imparts enough molasses-y flavor anyhow, as it's unrefined so still carries all of the minerals that are stripped from refined sugars when molasses is made. 

    Soft & Chewy Ginger Tahini Cookies
    Soft & Chewy Ginger Tahini Cookies

    Tips for making these chewy tahini ginger cookies: 

    • STIR THAT TAHINI. This is in all caps because it's no joke. Tahini separates fast and if your tahini is all oil or all solids you're batter won't work. Last time I published a tahini cookie recipe someone asked about how to best stir tahini, which is a really good question because it's not the easiest to stir. But don't worry! Just scrape the entire jar into a blender, and let it rip. OR, carefully put your immersion blender into your tahini container (this is what I do, but also can foresee what a mess this might make in the wrong circumstances) 

    • Let them cool. Really! I too like hot-out-of-the-oven cookies, but these cookies need a minute to set up. More like 5-10. They'll still be warm, and they'll stay soft for a week at room temperature. BUT, if you try to pick one up while it's still piping hot it will just collapse and melt in your hand (if you can even get it into your hand). 

    Ok, "mom" warnings over. Now, the recipe! 

    Soft & Chewy Ginger Tahini Cookies

    Soft & Chewy Flourless Ginger Tahini Cookies

    Published February 21, 2019 by
       Print This Recipe

    Yields: 16   |    Active Time: 30 minutes


    Ingredients:

  • 1 cup coconut sugar
  • 1/4 teaspoon baking soda
  • 1/4 teaspoon salt
  • 1/2 teaspoon ground ginger
  • 1/4 teaspoon ground cinnamon
  • 1/16 teaspoon ground cloves
  • 1 cup tahini (stirred very well - try blending it with your blender if it is separated)
  • 1 teaspoon vanilla
  • 1 egg
  • 1-1/2 teaspoon fresh ginger grated on a microplane
  • Optional: 1/3 cup ginger chips (like this - affiliate link) or finely chopped crystallized ginger

  • Directions:

    1. Preheat oven to 350°F.
    2. In a medium sized mixing bowl, combine coconut sugar, baking soda, salt, ground ginger, ground cinnamon, and ground cloves. Whisk briefly.
    3. Add tahini, vanilla, egg, and fresh ginger to bowl, and use a spatula to stir until a stiff, sticky batter forms.
    4. Optional: place bowl of batter in the fridge for 10 minutes to allow dough to stiffen a bit more.
    5. Using your hands, roll dough into spheres by the heaping tablespoonful. Place spheres at least 2 inches apart of a baking sheet lined with parchment paper, and flatted slightly with your fingers.
    6. Bake for 10-12 minutes, until cookies have spread and are golden. Cookies will still be quite soft when you remove them from the oven. Allow them to cool at least 10 minutes before attempting to move them to a cooling wrack or a plate.

    16 Comments