
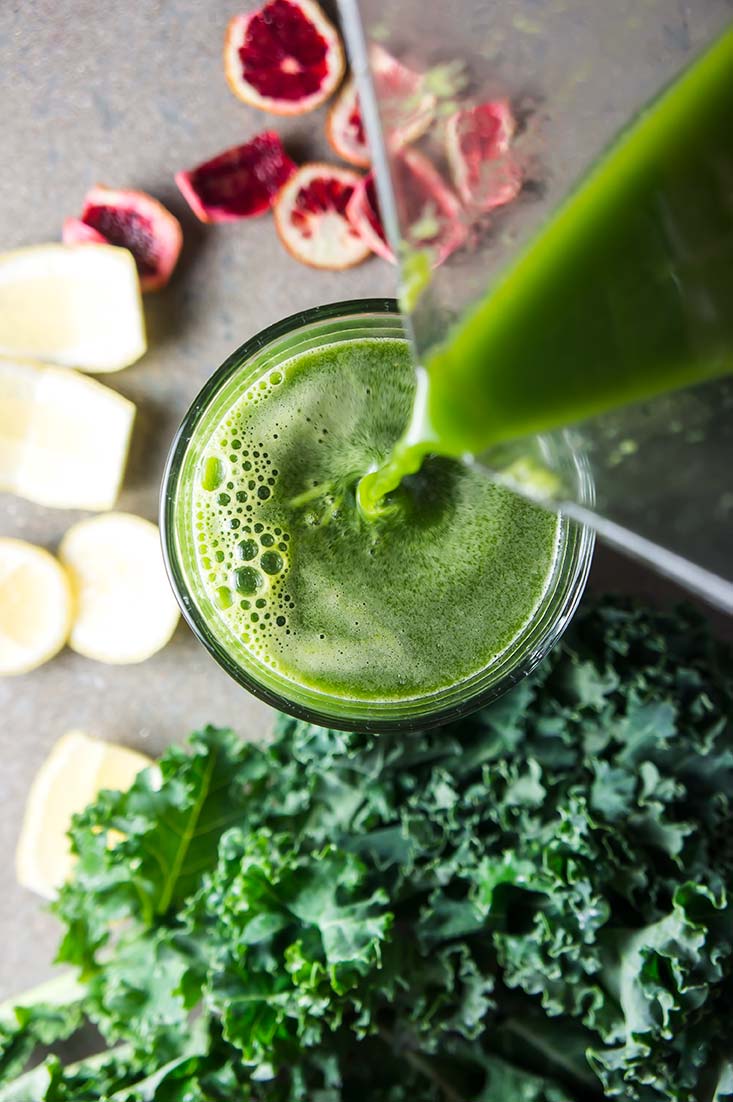
Immune Boost Green Juice
/
I’m not much of a juicer. Never have been. I’ve always been a little down on what I see as a glorified consumption of sugar. That might sound a little harsh, and I admit that it is. But more often than not I’d rather drink a smoothie with all of its fiber, or just eat a piece of goddamn fruit.
But, last week, there I was. I felt a tickle in my throat. Oliver had just finished reading me a news story about how the flu was out of control this year. And I decided I needed a boost. Green juice.
Have you been there? The “please, please, please don’t let me get sick,“ feeling? That’s what this juice is for.
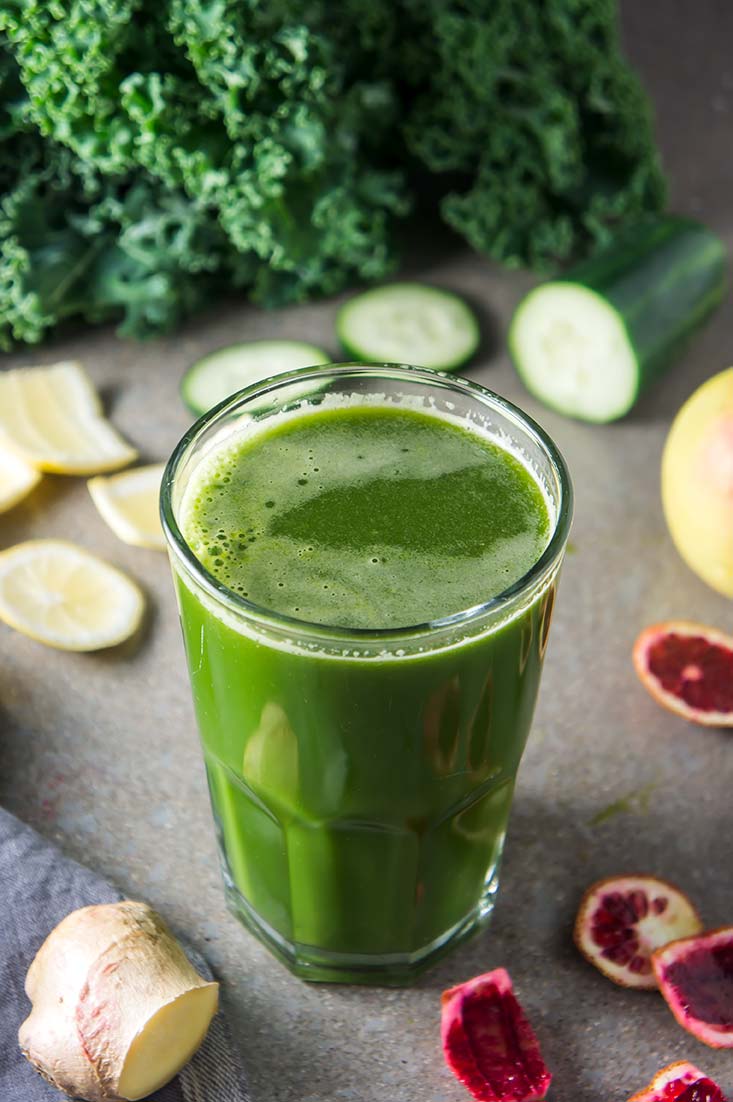
It is SUPER high in Vitamins C, A and K. Like nature’s Emergen-C! But, 100% natural.
I drank that green juice down (and loved it, citrusy, with a touch of ginger). The next morning, The tickle at my throat was gone, but two days later Oliver complained of a sore throat too, so there I was again making green juice again--the same green juice I had made for myself just a few days before.
Now, I’m still not that into juice. You'll find no recommendations on juice cleanses here. But this juice is like a multipurpose vitamin... like an insurance policy. You drink it with a wholesome breakfast and you get all those extra vitamin packed in.
So far, I'm still flu free: maybe it had something to do with this juice, or maybe not. Either way, I fell in love with green juice somewhere along the way. At least this green juice. The insurance policy.

Immune Boost Green Juice
| Print This Recipe
Serves: 2 | Total Time: 10 minutes
Ingredients:
- 2 leaves of dino (lacinato) kale
- 1/2 cup sliced cucumber
- 1 lemon, peel sliced off
- 1 blood orange, peel sliced off
- 1 and 1/2 apple, cored and roughly chopped
- 1 inch ginger
- 1 cup water
- 6 ice cubes, for serving
Directions:
- Place ingredients in a high powered blender: first the kale and then the cucumber, lemon and orange, apple, ginger, and water.
- Purée until smooth (I use a BlendTec (affiliate link!), and set the blender to the “Whole Juice” setting).
- Place a nut milk bag (affiliate link!) over a bowl or wide-mouthed jar, and pour purée through the nut milk bag to strain out the pulp.
- Optional: If you like, stir back in a tablespoon or two of the pulp.
- Divide ice cubes between serving glasses and pour juice over ice. Serve.

Grapefruit, Pomegranate & Ginger Smoothie
/
The day you read this, it will be the fourth day of 2018, and I will be headed to Monterey, California, but as I write it's only a few days after Christmas.
My office closes for the holiday, and I have the entire week to do whatever I want. A week ago I had tried to corral friends into organizing a trip to Red Rock Canyon (we went last year, and it was so so beautiful), but I had been late to the punch and it seemed everyone already had other things going on. Still, I didn't give up on my wanderlust: even early on Christmas eve, and I pieced together a half-baked plan to go to Santa Fe. Drive time, a place to stay, and a list of possible climbing spots. And of course, swooning over images of turquoise doors, cliff dwellings, and desert sun.
I could almost feel the heat, even there sitting at my computer. But instead of warming in the sun, hot air was blasting from the vents as our thermostat worked to combat the dropping temperatures outside. Wanderlust had me riveted, and begged me to go. Visions of a simpler time, when I was ten or so, floated through my mind: I had dreamed of being a National Geographic photographer, but at some point convinced myself that it wouldn't work. I liked traveling, sure, but I like being home too. I knew I would tire of being on the move. Plus, adults had bills to pay, and art wasn't stable...even my overly mature ten-year old self knew this. But right then, looking at images of Santa Fe, regret poured over me. I wanted--no, needed- to go.


My bubble deflated as the coffee set in and I came down from the clouds: a six-and-a-half hour drive on icy roads and in a foot of snow? "Fun" isn't the right word for a road trip like that. And I had been craving snow, fiercely. So instead we bundled up (long under wear, wool socks, snow pants, down coats, snow boots, gloves, and hats) and made our way through the white winter wonderland just outside our door, to hike through the foothills.
The cold preserved individual snowflakes, creating the fluffiest snow possible: not a spot of slush or sludge. Overcome with a childlike happiness, wanderlust momentarily forgotten, I wanted to plunge straight into the snow and make snow angels. Frozen pine needles glowing in the winter light; sparkling hills; the smell of winter in the air. Such beautiful things, right here under my nose. Besides, in just one short week I'd be in the California sunshine.
This smoothie takes the freshest, brightest flavors of winter and throws them all into a jar. The result is a gradient of pinks and magentas--a bold spot of color on a winter morning. When you're stuck looking at images of exotic places, or find yourself wishing for some adventure, try this smoothie. It's a rejuvenating splash of bright and bold that reminds you that there's no where better to be than in the now.
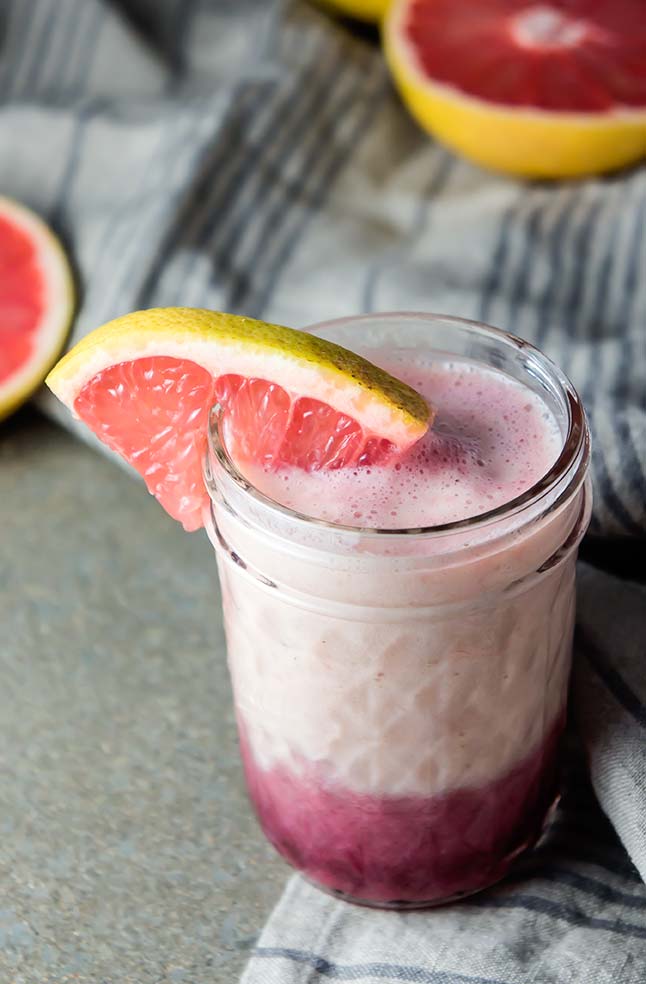
Grapefruit, Pomegranate & Ginger Smoothie
Serves: 2 | Total Time: 10 minutes
Ingredients:
- 1 banana, frozen
- 1 grapefruit, peeled, plus two grapefruit wedges of garnish (optional)
- 1 teaspoon fresh ginger, grated on microplane
- 1/2 cup milk
- 1/2 cup 100% pomegranate juice
Directions:
- Combine first four ingredients in a blender (affiliate link) and puree until smooth. Divide evenly among serving glasses.
- Slowly pour half of the pomegranate juice into each glass. It will sink to the bottom, creating a gradient effect.
- Garnish with grapefruit wedges and serve immediately.

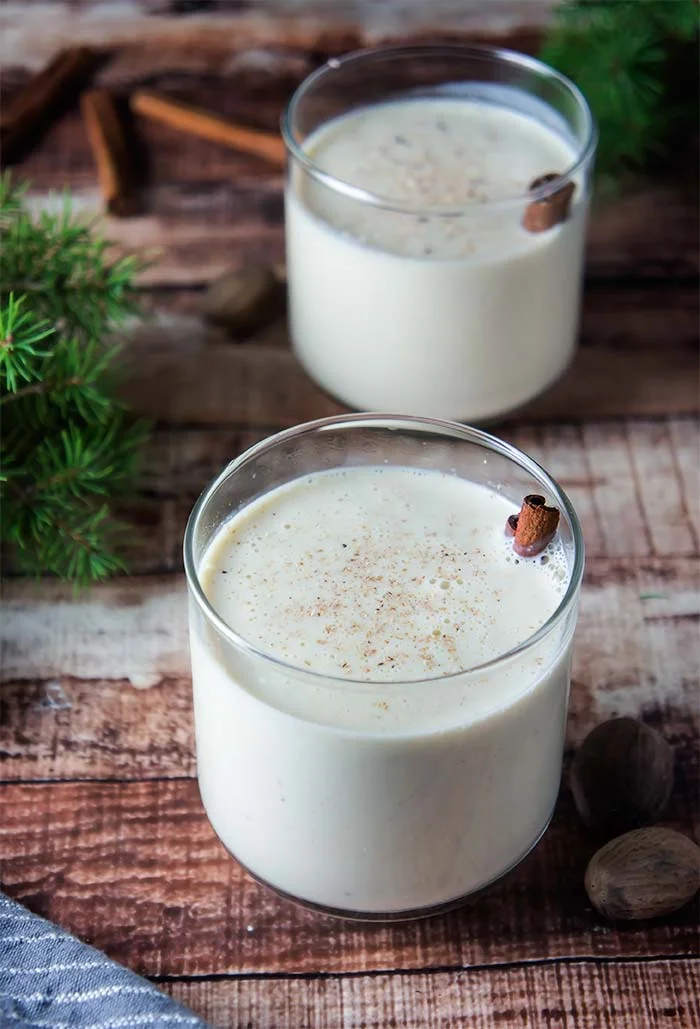
Maple Sweetened Eggnog (No Refined Sugar!)
/

Eggnog is a surprisingly polarizing drink. Surprising to me, because of how much I love it. It is creamy, sweet, and lightly spiced (which you know I love if you read my recent gingerbread post).
When drinking eggnog I try--try so hard- to make it last, sipping slowly the way you would with a glass of wine. It never really works, going down far too easy.
This eggnog is just how I like it: creamy, sweet, with a hint of spice. There are a lot of variations on eggnog so if you would like to customize yours, here are some tips!
On Spiking Your Eggnog: I prefer not to tamper with my eggnog, and let it stay like it was when I was a kid. Alcohol free. That's just me. There's likely a time and a place that spiked eggnog would fit into my life well, but regular old eggnog drinking isn't it. This recipe works either way: my friends stirred in whiskey, which adds to that sharp spicy flavor. Rum would be good as well! No matter what, top with fresh nutmeg (advice from my grandmother).
To Cook or Not to Cook: This recipe will ask you to cook your eggnog on the stove-top. It doesn't take long, and it helps you get a thick, creamy eggnog. I've made it in the blender (i.e., skipped cooking), and the flavor is there but the creaminess falls a bit short (Plus, without adding alcohol, this makes drinking the raw eggs a little risky). Lots of recipes will ask you to whip your egg whites to stiff peaks and fold them in to get that creamy texture, but that is just too much work (...in my opinion 😉) considering you could also just stir everything on the stove for a few minutes. And while eggnog is usually enjoyed cold, warm eggnog straight from the stove is something else (and an experience worth having).
If you want to skip the cooking but don't want to eat raw eggs, try this smoothie (which is Paleo and dairy-free!).

Maple Syrup > Sugar: This recipe calls for maple syrup rather than sugar. It does have a subtle maple flavor, but it's quite nice, and I'm surprised you don't see more maple sweetened eggnogs around. It might sound odd, but really, has maple syrup ever messed up anything?? Plus, it's an unrefined sugar. Three cheers for maple syrup!
What's All the Fermentation Talk? Fermenting eggnog is the traditional way, and does several things. First, it mellows out any alcohol you may have put in. Second, whatever alcohol you have added kills off any bacteria (or so I've heard). Third, it gives flavors time to meld together. Have you heard of leaving your cookie dough in the fridge over night? Same idea. Key to fermentation: use booze. The alcohol is what kills off any bacteria. I wanted my eggnog now, so this recipe is a drink-it-right-away recipe. You can try adding booze and fermenting it for a few weeks if you're that sort of daring (use a 1/4 cup cognac and 1/4 cup rum).

Maple-Sweetened Eggnog (No Refined Sugar!)
Serves: 12 | Total Time: 30 minutes
Ingredients:
- 3 cups whole milk
- 1 cup heavy cream
- 4 whole cloves
- 1/2 teaspoon ground cinnamon
- 1/2 teaspoon ground nutmeg, plus more for serving
- 1/2 teaspoon vanilla
- 6 egg yolks
- 1/2 - 3/4 cup maple syrup
- Pinch of salt
Directions:
- Combine milk, cream, cloves, cinnamon, nutmeg, vanilla, and pinch of salt in a sauce pan and heat until almost simmering. Stir frequently to avoid scalding.
- While the milk heats, whisk together the egg yolks and 1/2 cup maple syrup until frothy and golden.
- Ladle 1 scoop of the hot milk into the egg mixture, while whisking it quickly to avoid curdling. Do this two more times to temper the eggs and then pour the egg mixture into sauce pan with milk, whisking while you pour. Cook for 3-5 minutes while whisking constantly. Do not allow mixture simmer (or boil), as this will cause the eggs to curdle.
- Once eggnog begins to thicken, remove from heat. At this point, you may add extra maple syrup if you would like, just taste it and adjust, stirring between each addition. (for me, the 1/2 cup we added in step 2 is enough, but if you are accustomed to store-bought you might want a bit more).
- Pour the eggnog through a fine mesh sieve to remove the whole cloves and ensure a silky smoothy eggnog.
- Pour in an air-tight container and chill in the fridge. Serve topped with freshly ground nutmeg. (I'm often impatient and drink it while it's still warm -- yummy that way, too!)


