Green Chile & Pepper Jack Cheese Quiche

Green Chile & Cheese Quiche

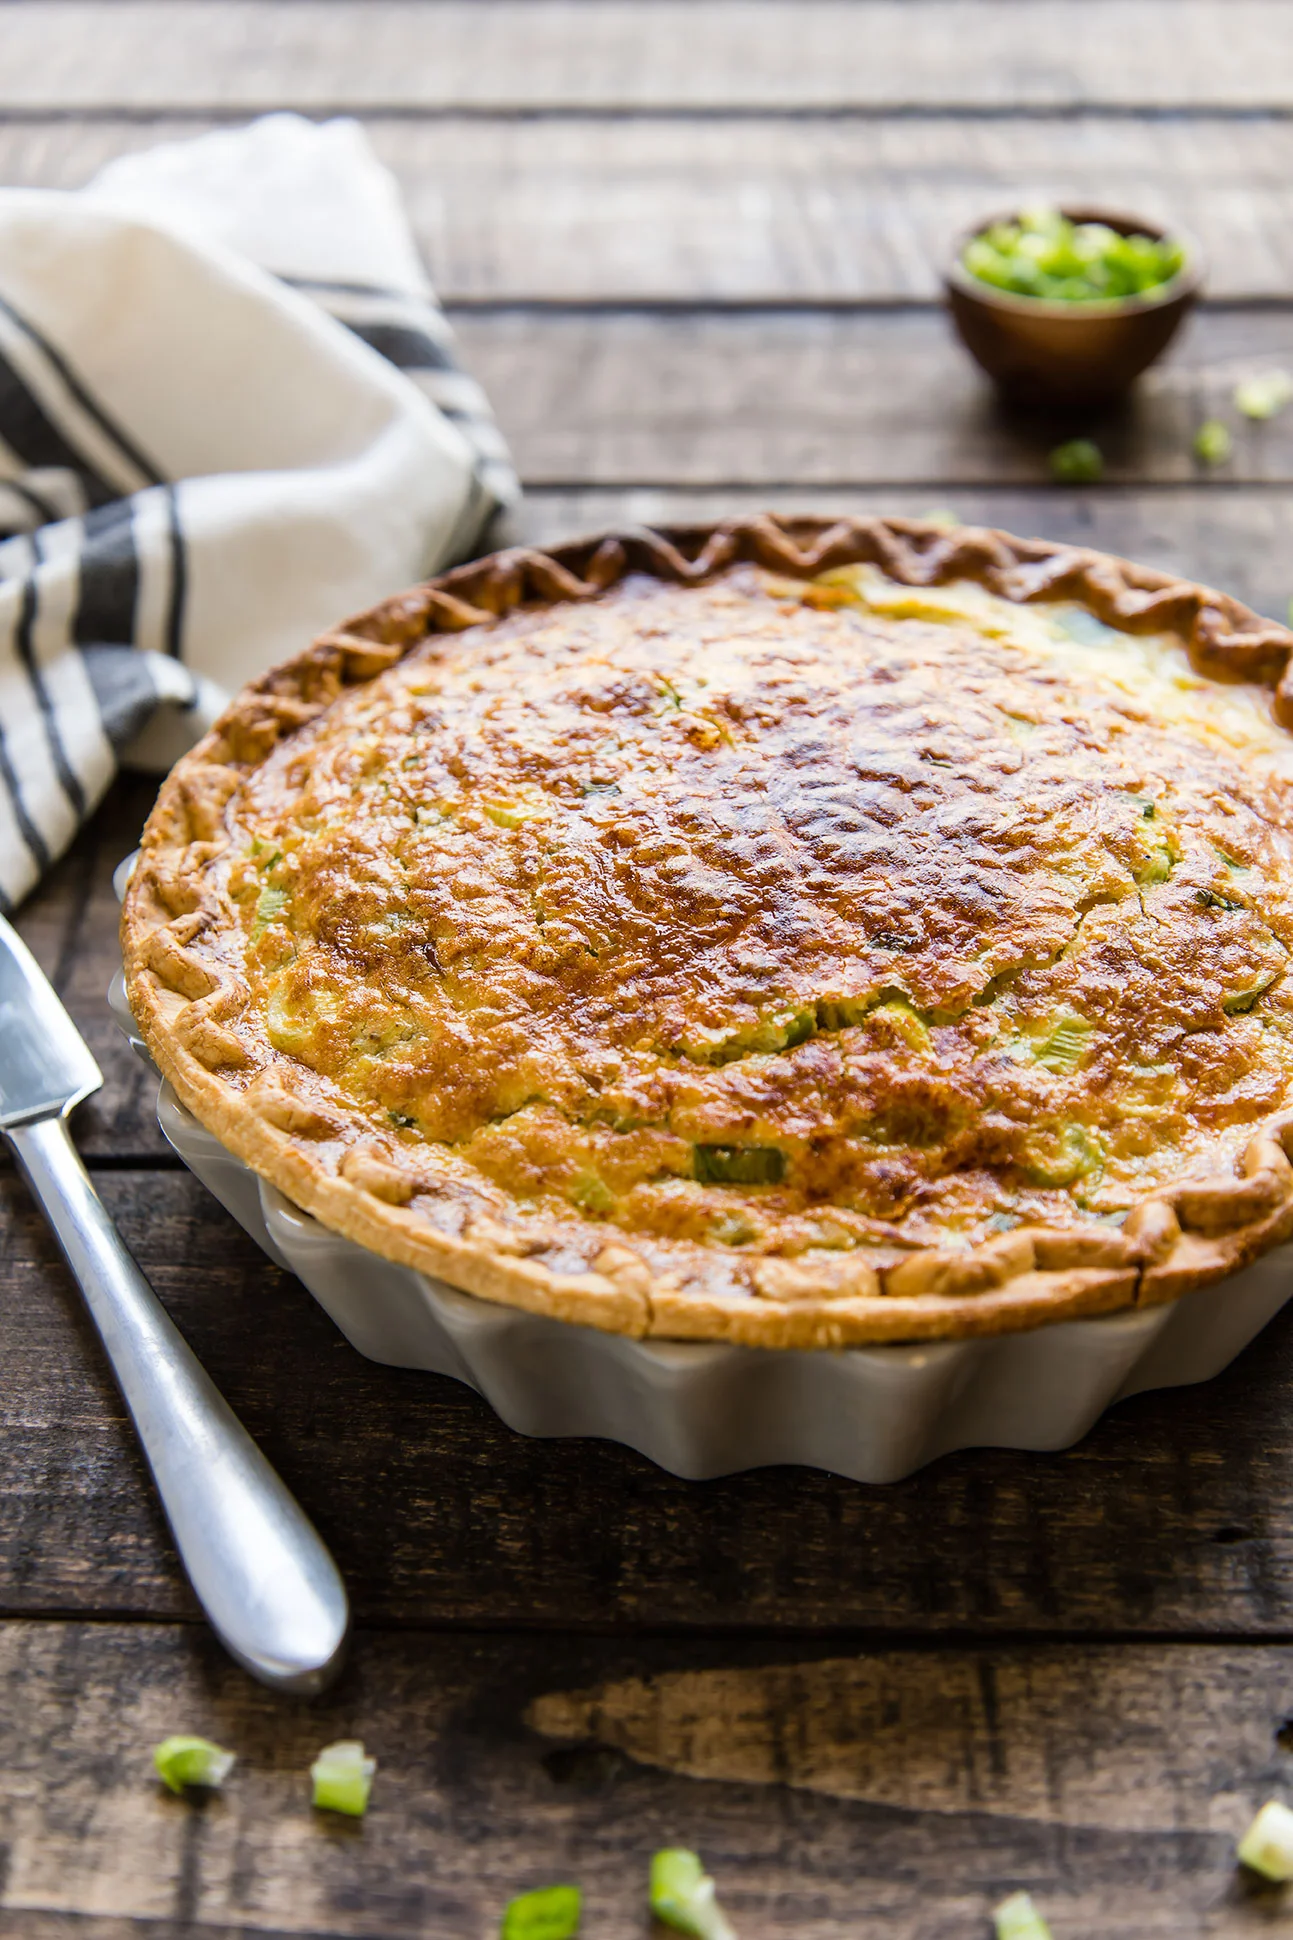
When you need a make ahead breakfast or lunch, quiche is the way to go. This one is the epitome of ease. The only thing you have to chop is green onions, and I certainly won’t tell if you use a store-bought pie crust (as long as you don’t tell anyone that I did that, too 😉).

I am a big fan of green chiles—as a stew, stuffed, or otherwise. I almost always have a can of roasted green chiles in the pantry, but you could also use freshly roasted or even frozen (and thawed) green chiles. They taste very summery, though many recipes using them feel wintery (like stew). This quiche, on the other hand, doesn’t really care what season it is. Serve with a simple side salad to make a complete lunch.

Green Chile & Cheese Quiche

Green Chile & Pepper Jack Cheese Quiche

Published June 19, 2019 by
   Print This Recipe

Serves: 6-8   |    Active Time: 60 minutes


Ingredients:

  • 1 deep-dish pie crust 
  • 5 eggs
  • 1/2 cup heavy cream
  • 1 cup shredded pepper jack cheese
  • 1 4-oz can green chiles 
  • 2 green onions, white and dark green parts removed
  • 1/4 teaspoon ground black pepper 
  • 1/4 teaspoon salt
  • 2 dashes paprika, plus more for topping 

  • Directions:

    1. Bake pie crust according to directions.
    2. Meanwhile, whisk together eggs and cream in a large bowl until frothy. Add cheese and green chiles. Chop the green onion, and add to egg mixture. Add salt, pepper, and two dashes of paprika and stir to combine.
    3. Pour egg mixture into prepared pie crust. Sprinkle top of pie with a dash of paprika.
    4. Bake quiche at 400°F for 25-35 minutes, until center of quiche has puffed, and the filling is set. Note: if the edges of your crust are browning too quickly, you can cover them using thin strips of foil (leave the quiche filling uncovered).
    5. Allow quiche to cool 10 minutes before slicing.
    6. Store leftovers in an airtight container in the fridge.

    Comment

    Grain-Free Butternut Squash Pie with Pecan-Crumble Crust

    Grain-Free Butternut Squash Pie with Pecan-Crumble Crust

    There are too many good recipes to share with you all this month! I usually only post two recipes a week, but this month I just couldn't get everything to fit into that schedule. My options were to ditch a recipe or publish an extra, and well, the answer was clear once we had a bite of this butternut squash pie with pecan crumble crust. 

    My good friend had a butternut squash pie making craze last year, and while he seems to now be over that caramelly, cinnamon-y flavor, I'm still stuck on it. 

    What I needed though, to really make the ultimate butternut squash pie, was an alternate crust. I've always been partial to graham cracker crusts (the kind you find on many cheesecakes) but wanted to keep this recipe from-scratch and grain-free.

    Grain-Free Butternut Squash Pie with Pecan-Crumble Crust

    Pondering this crust dilemma brought me to pecans. It wasn't sure pecans would work in place of graham crackers, but I had a hunch. I was nervous about it, putting the pie into the oven. A few friends stopped by and I explained to them it was just an experiment and could go terribly wrong. 

    Out of the oven it came and I was, even then, a little nervous. I took pictures, serving everyone else, and then grabbed the last piece for myself, topping it with an oversized dollop of whipped cream.

    Grain-Free Butternut Squash Pie with Pecan-Crumble Crust

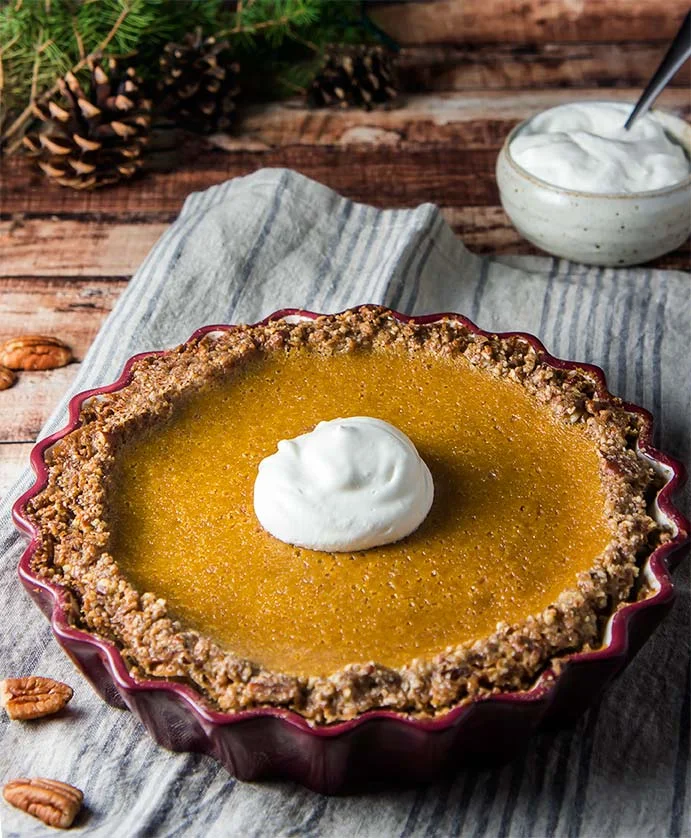
    It was my butternut-pie-making-friend who said it first: a crust made of pecans is like a butternut pie inside of a pecan pie. A custardy filling nestled inside a crunchy, sweet, nutty shell. 

    He was right: it was a butternut squash pie inside of a pecan pie. The butter and sugar caramelized in the oven while the pecans toasted, making something so delicious it stole the show, even from the pie filling itself. 

    In this pie, crust is no longer just a vehicle for transporting filling. It's a part of the experience, as must as every other ingredient. 

    Grain-Free Butternut Squash Pie with Pecan-Crumble Crust

    Grain-Free Butternut Squash Pie with Pecan-Crumble Crust

    Published December 15, 2017 by
       |     Print This Recipe

    Serves: 8   |    Total Time: 1 hour 15 minutes


    Ingredients:


      For the crust:
    • 2 cups pecans 
    • 1/3 cup packed light brown sugar or coconut sugar
    • 4 tablespoons butter, melted
    • 1/2 teaspoon ground cinnamon 

    • For the filling:
    • 10 ounces frozen cubed butternut squash, thawed
    • 1/4 cup packed light brown sugar or coconut sugar
    • 1/4 cup wildflower honey
    • 2/3 cup half-and-half 
    • 1-1/2 teaspoon ground cinnamon
    • 1/4 teaspoon ground nutmeg
    • 1/4 teaspoon ground ginger
    • 1/4 teaspoon salt 
    • 3 eggs
    • 1 tablespoon butter, melted 
    • 1 teaspoon vanilla extract 

    • To serve:
    • 1/2 cup heavy whipping cream
    • 1/2 teaspoon vanilla extract

    Directions:

    1. Preheat oven to 350°F, and grease an 9-inch ceramic or glass pie pan .
    2. Put pecans in a food processor and pulse to grind them into a fine crumb. Scrape sides frequently to ensure even chopping. Few larger chunks should remain (several are ok but for the most part you are looking for an even, fine crumb). Scrape pecan crumbs into a bowl, and add sugar and melted butter. Use a spatula to stir until everything is combined and crumb should stick together when squeezed between two fingers. Now, press crumb mixture into prepared pie pan, working it up the sides and into an even layer along the bottom to form a crust. Tip: use the flat bottom of a glass to make a smooth bottom. Make sure there are no gaps or cracks, and then set aside.
    3. In a blender, combine: thawed butternut squash, sugar, honey, half-and-half, cinnamon, nutmeg, ginger, salt, eggs, melted butter, and vanilla. Puree until completely smooth, scraping sides down as needed. Then, allow mixture to rest for 5 minutes so any air bubbles have time to float to the top.
    4. Pour butternut mixture into prepared pie shell, filling it until almost—but not quite- full (shoot for 90-95% full). Place in oven and bake for 45-55 minutes, until custard filling jiggles slightly in the middle but not at the edges. Turn heat off, and allow pie to cook in oven with the door open for 10-15 minutes. This super slow cooling method will prevent the custard filling from cracking.
    5. While the pie cools, make the whipped cream. Add heavy cream to a bowl and whip with an electric mixture until it beings to hold peaks. Add vanilla, and beat 30 more seconds.
    6. Serve pie with dollops of whipped cream (ice cream would be good as well!).

    10 Comments

    Crustless Peach & Blackberry Bakewell Tart (Gluten-Free & Paleo)

    Crustless Peach & Blackberry Bakewell Tart (Gluten-Free & Paleo)

    It is 8pm, and I am just walking out of the climbing gym. My tummy has been rumbling for the last 30 minutes. It is Tuesday, but it feels like Thursday and exhaustion sinks in. I can only blame myself; I stayed up late last night finished season two of the Great British Bake Off (GBBO). 

    A soft breeze picks up and that's when it finds me, wraps around me, and gives me a hug: the smell of cinnamon rolls as they bake. Our climbing gym is no more than one block from an industrial bakery, and this happens more than once a week. It's not always cinnamon rolls, though that's what I smell most often. Some days a batch of sourdough fills the air with it's toasty aroma instead, and occasionally I catch a whiff of something I can't quite place. 

    Crustless Peach & Blackberry Bakewell Tart (Gluten-Free & Paleo)
    Crustless Peach & Blackberry Bakewell Tart (Gluten-Free & Paleo)

    My stomach whines again. Can you blame it? Between the GBBO marathons and the ill-timed smell of cinnamon rolls, my subconscious mind wants nothing more than to bake. It will take everything in me to make something "real" for dinner, instead of something cinnamon-y and sweet. 

    That was last week (and I did manage to make a real dinner that night!). This week, I'm dealing with the issue at hand: I'm baking! It is a holiday weekend after all. This Bakewell tart is inspired by the famous Mary Berry (host of the GBBO), who is so well known for her Bakewell tart. This version has a few twists, however: I use coconut sugar instead of white sugar, and bake the whole thing with out a crust. For a final touch, fresh fruit is baked right into the tart, giving it color and a summery vibe. Mary Berry probably wouldn't even call this a Bakewell tart, but I'm in love with it. Bring on the seconds (and thirds and fourths!) 

    Crustless Peach & Blackberry Bakewell Tart (Gluten-Free & Paleo)

    Crustless Peach & Blackberry Bakewell Tart (Gluten-Free & Paleo)

    Published July 4, 2017 by
       |     Print This Recipe

    Serves: 8   |    Total Time: 60 minutes


    Ingredients:

    • 150 grams butter, softened
    • 100 grams coconut sugar ground fine
    • 150 grams almond flour
    • Pinch of salt
    • 1 egg
    • 1 teaspoon almond extract
    • 1 peach
    • 1/4 cup blackberries

    Directions:

    1. Preheat oven to 375°F.
    2. Melt the butter in a thick-bottomed sauce pan. Once fully melted, remove from the heat and stir in the coconut sugar. Then, add the almond flour, a pinch of salt, the egg and almond extract, and stir until combined. Pour into pie plate or tart pan.
    3. Slice the peach in half, and then cut each half into 10 thin slices. Pick up 5 slices at a time and fan them. Place on top of batter, and repeat with the remaining three sets of five slices. Then, place the blackberries around the peaches.
    4. Bake for 35 minutes, until the tart is golden on top. It still make jiggle in the center a small amount. (Tip: check on the tart after 20 minutes, and cover the outside edges with foil is they are browning too fast. This will help it bake more evenly). Allow tart to cool for 10-15 minutes before serving. (Ice cream is a definitely yes!)

    We are a participant in the Amazon Services LLC Associates Program, an affiliate advertising program designed to provide a means for us to earn fees by linking to Amazon.com and affiliated sites.

    4 Comments