Instant Pot Yellow Dal

Instant Pot Yellow Dal

The air smells of pine as it whips in the window. Up here, it’s 62 degrees. The Aspens have turned; their bright yellow leaves look stark against the pine trees mixed among them. The air is thin, there is not a bar of cell service to be found, and the moon is up. This is Mount Evans.

We’ve gone to Mount Evans to climb several times this summer and the change in elevation is always the perfect escape from the summer heat. (Eh-hem, I’ve obnoxiously shared the exact same view every weekend for the last month on my Instagram stories. I just can’t help it — the view takes my breath away every time.) Lately though, it’s been even better than usual because of the fall colors and crisp air. And, even I avoid cooking when it’s ninety degrees out, but when it’s only sixty-two, bring ooooon the baked goods, stews, and cozy foods.

Instant Pot Yellow Dal

I love red lentils when the weather starts to turn, and my go-to is dal. It’s creamy, spicy, satisfying, and so easy to make in an Instant Pot. So easy! The best weekend days start with breakfast, take us climbing somewhere among the Aspens, and end in dinner from the Instant Pot.

Instant Pot Yellow Dal

Instant Pot Yellow Dal

Published October 11, 2018 by
   Print This Recipe

Serves: 8   |    Active Time: 30 minutes


Ingredients:

  • 2 cups red lentils
  • 2 tablespoons coconut oil, divided
  • 6 cloves garlic, minced
  • 2 small red onions or 1 large, diced
  • 2-inch piece of ginger, minced
  • 1 jalapeño, minced
  • 1 teaspoon whole black mustard seeds
  • 1 teaspoon whole cumin seeds
  • 1 teaspoon ground coriander
  • 1 teaspoon ground turmeric
  • 1/4 teaspoon ground cayenne
  • 1/2 teaspoon salt
  • 1/4 teaspoon ground black pepper
  • 4 cups vegetable broth
  • Juice 1/2 lime, plus wedges for serving
  • 1/4 cup cilantro, minced, plus more for garnish

  • Directions:

    1. Turn the Instant Pot (affiliate link!) to sauté setting. Add 1 tablespoon coconut oil to the Instant Pot. When the oil is hot, sauté the garlic, onions, ginger, and jalapeño, stirring occasionally.
    2. While onions cook, heat the remaining tablespoon of oil in a small skillet over medium-low heat. When oil is hot, add mustard seed and cumin seeds, and toast until fragant. (Watch the seeds closely to avoid burning them—the cook quicly).
    3. Scape the cumin and mustard mixture into the Instant Pot. Add broth, ground coriander, ground turmeric, ground cayenne, salt, ground black pepper, lime juice, and cilantro and stir.
    4. Place lentils in a fine mesh strainer and rinse with cool water. Strain, then add to the Instant Pot. Stir well.
    5. Place lid on Instant Pot and turn to “Manual” setting and adjust to high pressure. Set timer for 10 minutes with the seal closed.
    6. When the timer goes off, release the pressure or allow it to release naturally. Stir the lentils, and serve hot with lime wedges and cilantro.
    7. To make this on the stove top instead of an Instant Pot: Use a large soup pot. In step 3, bring everything to a simmer and cook, stirring occassionally, for 15-20 minutes, until lentils are softened through.
    8. Note: If you soak your lentils for 6-12 hours ahead of time (we usually do this), then strain water from lentils before use. Reduce cooking time to 4 minutes.

    2 Comments

    Roasted Zucchini, Corn & Basil Salad

    Roasted Zucchini, Corn & Basil Salad

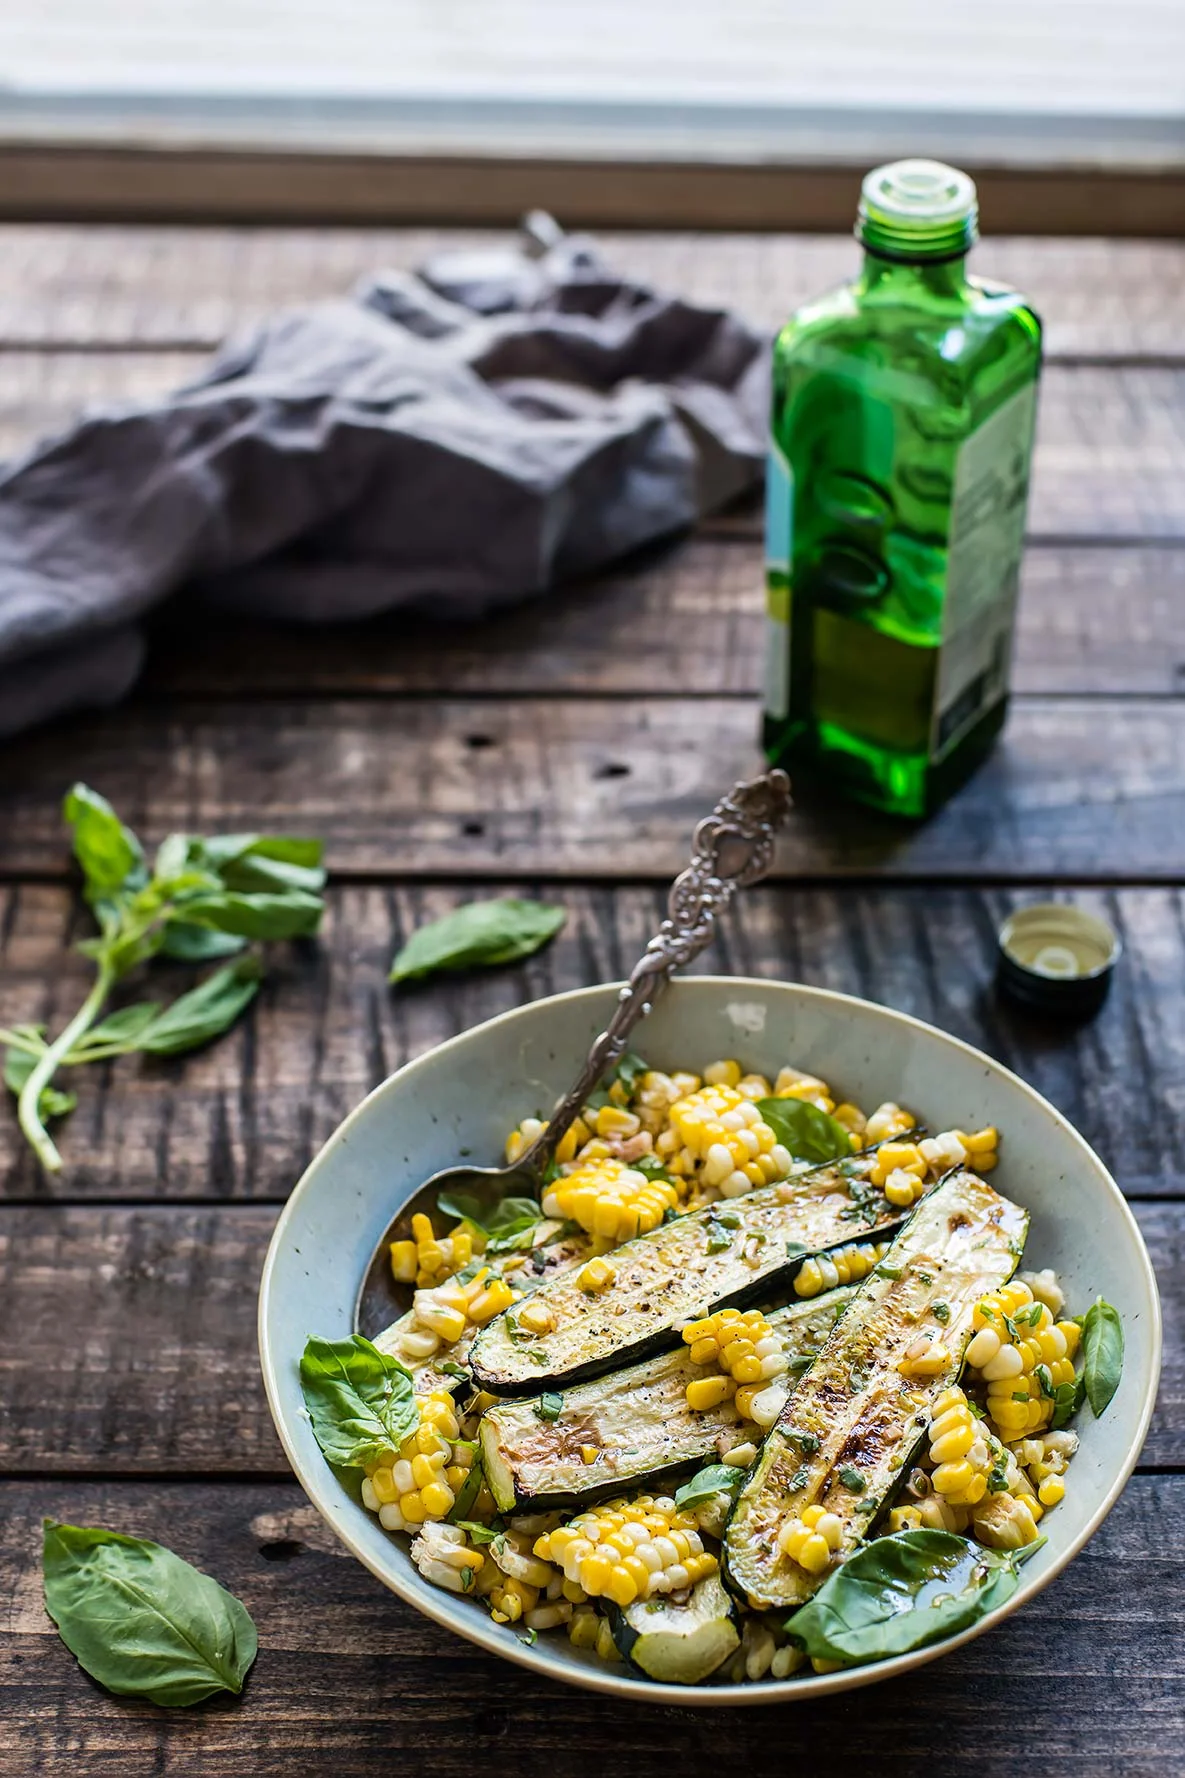
    This salad is made of three quintessential mid-summer crops: corn, zucchini, and basil.

    Zucchini is one of my all-time favorite veggies, because it’s so versatile. It’s good sautéd, raw, zoodled, or in this case, roasted (any grill masters out there? You can do the roasting over an open flame if that’s more your style!). Use young zucchini in this recipe. They are more tender, have smaller seeds, and you can simply cut them in half (the long way) rather than into strips. Yellow summer squash would work well too! 

    There’s a saying, “things that grow together go together,” and it’s certainly the case here. Roasted zucchini needs little in terms of seasoning, but a little fresh basil brightens this dish up. Good warm or cold, this salad is the perfect backyard grill out side dish! To turn this recipe into a heartier salad, one you could eat for lunch, try adding shredded parmesan and diced avocado. 

    Roasted Zucchini, Corn & Basil Salad
    Roasted Zucchini, Corn & Basil Salad
    Roasted Zucchini, Corn & Basil Salad

    Have even more zucchini to use? Try these zucchini bread pancakes.

    Roasted Zucchini, Corn & Basil Salad

    Published July 24, 2018 by
       Print This Recipe

    Serves: 4   |    Active Time: 30 minutes


    Ingredients:

  • 4 small zucchini
  • 3 cobs of corn
  • 1/2 cup fresh basil
  • 2-3 tablespoons olive oil

  • For the vinaigrette:
  • 1 clove garlic, minced
  • 1/4 cup extra virgin olive oil
  • 2 tablespoons red wine vinegar
  • 1/8 teaspoon salt
  • 1/8 teaspoon pepper
  • 1/8 teaspoon honey or maple syrup

  • Directions:

    1. Preheat oven to 450°F. Slice the zucchini into long strips, about 1/4 inch to 1/2 inch thick. Brush zucchini and corn with olive oil and place on sheet pan. Bake for 20 minutes, until softened. Turn oven to high broil, and cook for 3-5 more minutes, just to get the corn and zucchini really roasted. (Note: You can also do this step on your grill, and skip the oven!)
    2. Allow zucchini and corn to cool so that you can handle them with out burning yourself. Arrange zucchini in a salad bowl, and then use a knife to cut the kernels from each corn cob. Add kernels to the bowl. Cut basil chiffonade style, reserving a few whole leaves for garnish, and add to the bowl. Toss everything to combine.
    3. Combine all ingredients for the dressing in a jar and shake. Pour over salad, top with reserved basil leaves, and serve.

    Comment

    Honey, Lime & Mint Popsicles

    Honey Mint & Lime Popsicles

    Happy summer to you all! 

    There is a deep rooted disbelief in my mind, that when I plant a little seed it will sprout (and if it doesn’t sprout in a few days, that disbelief is only confirmed, at least until finally, two weeks later, like baby plants start popping up on the surface of the garden). 

    Age old wisdom is that in fact, this is how the world works. Still, Mother Nature never ceases to amaze. Every year, it’s like she has to teach me anew the wonder that is life and it’s circle. (Ehem... most recent lesson was last weeks hail, which completed the circle of life for many of those little plants 🙄).

    My wonder and disbelief cause me to spend more hours than needed coddling each vine: peering at new growth, cheering on a new leaf here and there, gawking at each flower. The sun is hot and when I stand from I crouch, my head spins: How long have I been out here? How hot is it? Where is my sun hat? 

    Honey Mint & Lime Popsicles

    Sometimes (ok, a lot of times,) I will run to Oliver and exclaim, “the corn stalks are ten and a half inches tall today!” Or “the squash has five leaves right now!” But how can one not be awed by the power of plants in action? They are our livelihood, as humans, after all. 

    I made these popsicles because when it is hot and I have spent too much time under the sun, I crave something tart, cold, and hydrating. The perfect solution for this craving came to me when a friend brought over a pack of lime popsicles, which we devoured. These Honey Lime Mint popsicles are my own rendition, using real lime juice, naturally sweetened with honey, and a touch of plant power (mint!). Each pop tastes like a mojito on a stick, minus the booze, which is just fine by me.

    Mint is a very easy plant to grow here in the front range — in fact, it will completely take over if you let it. You have to strategically block it into it’s space, or it will through out shoots and be all over your garden bed in no time. One way to tame it is to pick boat loads of it. And make popsicles! The perfect compliment to mint? Lime, sweetened naturally with honey.

    I have learned recently that lime is not everyone’s favorite flavor, but I still don’t really understand. I love lime, I always will. 

    Honey Mint & Lime Popsicles

    Notes:

    • I use this popsicle mold, though sometimes we find the popsicles hard to get out of the mold (affiliate link).

    • You might try a silicon popsicle mold which would allow you to more easily get the popsicles out (affiliate link).

    • I also have a set of tube-style molds which are good if you don't want to deal with a popsicle stick or drips! (Affiliate link).

    Looking for something boozy? Try these sangria pops! 

    Honey, Lime & Mint Popsicles

    Published June 21, 2018 by
       |     Print This Recipe

    Yields: 7   |    Active Time: 20 minutes


    Ingredients:

  • 2-3 tablespoons honey, depending on your sweet tooth
  • 1/2 cup lime juice
  • 2 cups water
  • Tiny pinch of salt 
  • 2 tablespoons minced fresh mint, sliced into thin pieces

  • Directions:

    1. Pour honey, lime juice, water, and pinch of salt into a sauce pan. Bring to a simmer, stirring until the honey is dissolved.
    2. Pour limeade mixture into popsicle molds, and sprinkle mint leaves over top. Place popsicle sticks in molds, and place in freezer overnight or until frozen through.

    Comment