Slow Cooker Mole Chicken Tacos

Slow Cooker Mole Chicken Tacos

There is a lot of folk lore surrounding the creation of mole poblano — the chocolate chili sauce Mexico is so known for.

One theory is that a convent of nuns invented mole for an archbishop in an effort to impress him, when no other ingredients could be found. Another story says that it was all a mistake, that a monk (rather than a nun) first made the dish for the archbishop when he accidentally knocked several stray spices into the pot. Either way, both versions tie the sauce back to over 300 years ago!

It’s no wonder there is so much speculation over the dish’s origins… mole sauce recipes typically call for a hefty list of seemingly random ingredients. But that’s part of the magic: it may not strike you that raisins and tomatoes and chili powder and cocoa will blend well together, but sure enough, the result is stellar. Spicy, tangy, with a rich backdrop, thanks to the chocolate.

Slow Cooker Mole Chicken Tacos

Something else stays consistent across almost every origin story, and that’s that mole is for special occasions. My dad will slave over a batch of mole for Christmas dinner; and me? I usually save it for a day when I know I can sit down and really take the time to enjoy the meal.

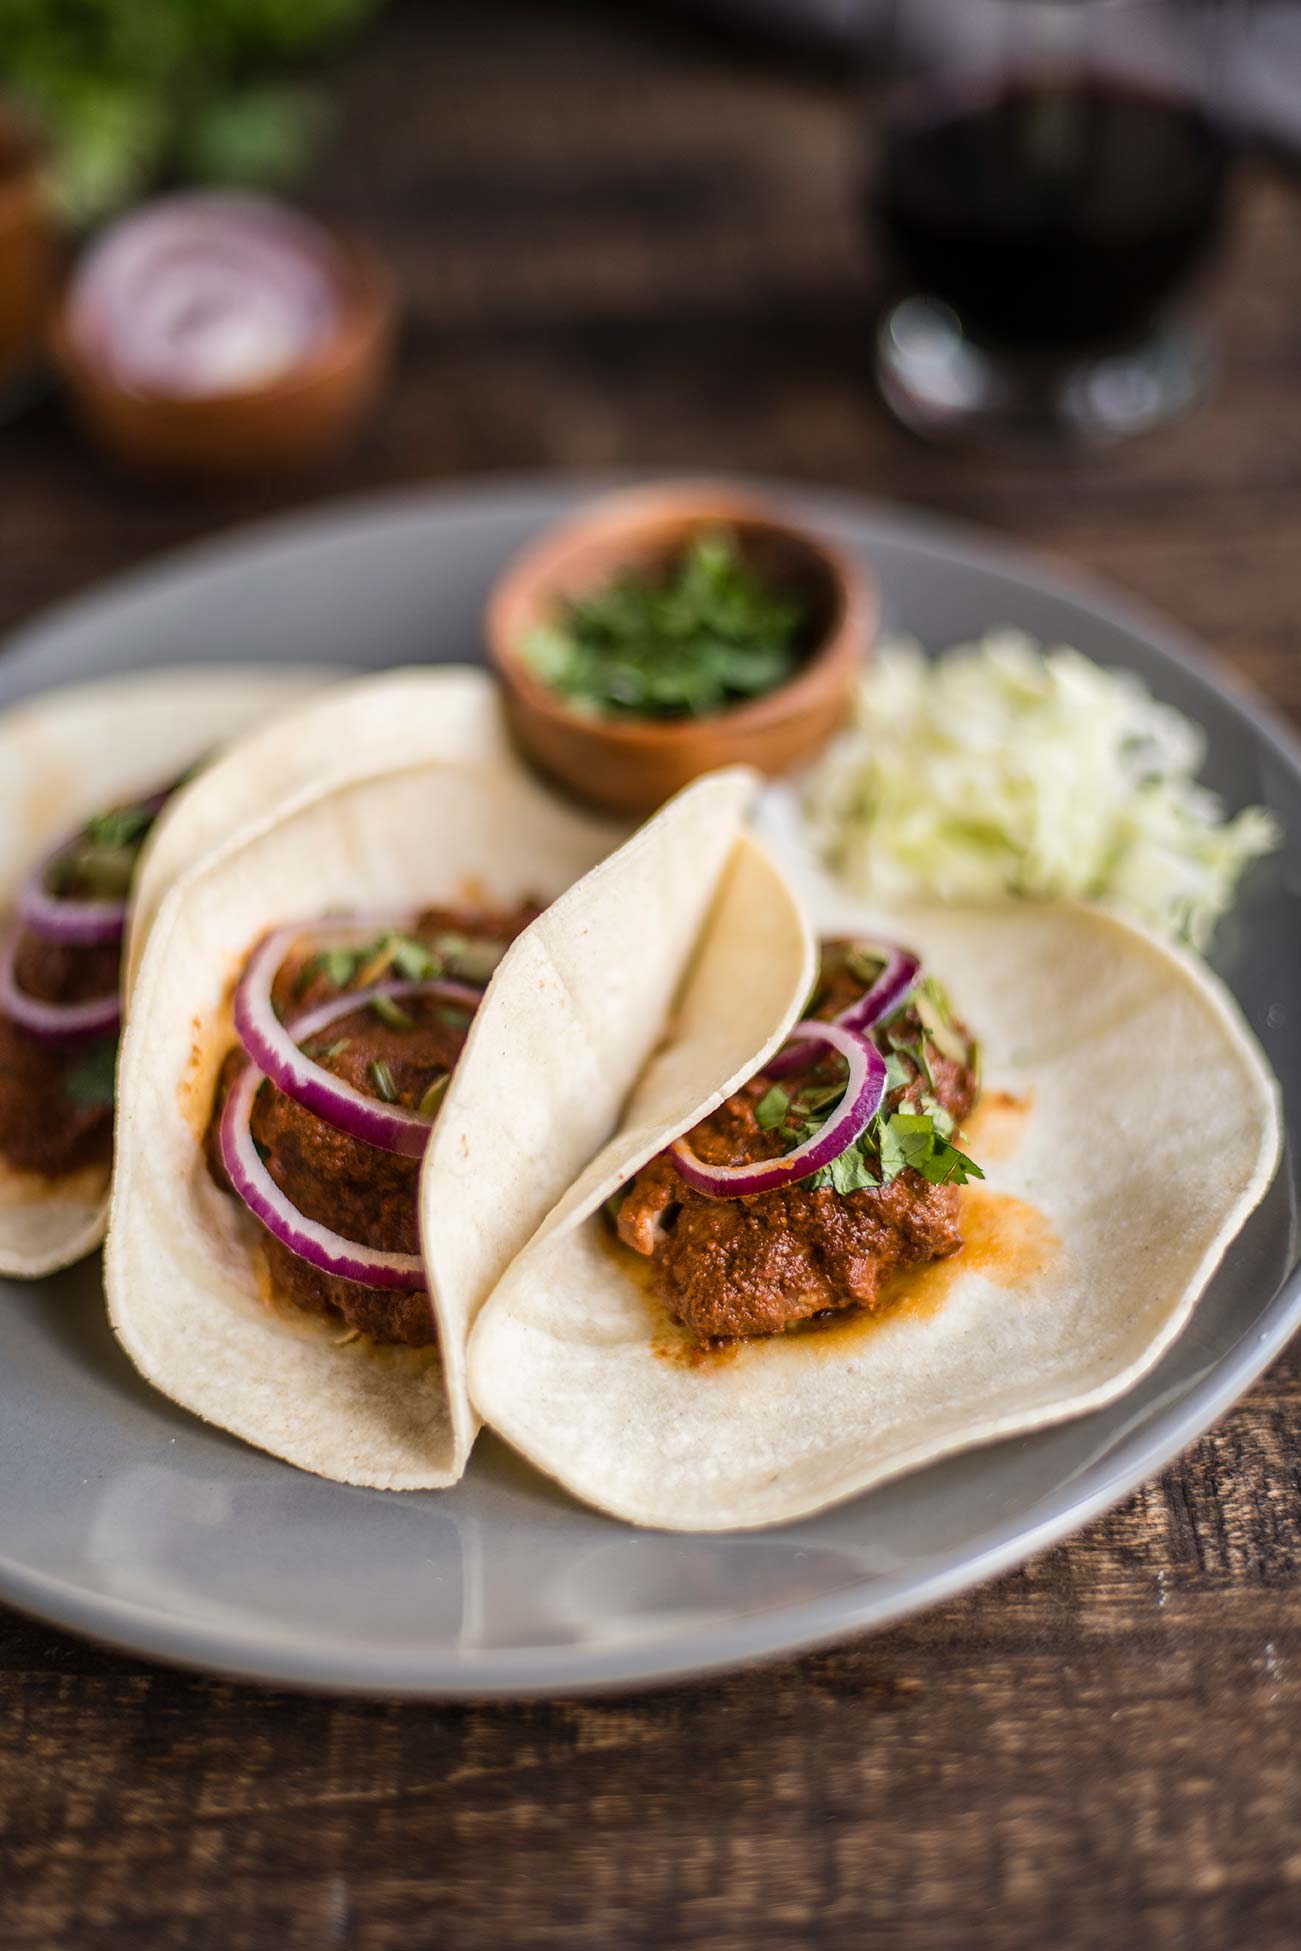
Such a complex sauce does not need many frills. Simmer some chicken (or turkey, or pork, or black beans, or whatever you have) until tender, and then serve simply. All you need for a fancy taco is a corn tortilla, some chicken in mole sauce and a sprinkle of cilantro. A few thin slices of red onion certainly brighten it up, and why not — a few pepitas on top for crunch (you have them out from making the sauce, anyhow). Now, this isn’t the traditional way to serve mole, which is over a bed of rice, but it’s easy nonetheless, and everything is delicious as a taco.

Slow Cooker Mole Chicken Tacos

Slow Cooker Mole Chicken Tacos

Published December 18, 2018 by
   Print This Recipe

Serves: 6-8   |    Active Time: 60 active minutes


Ingredients:

  • 2 pounds boneless skinless chicken (breasts or thighs)
  • 1 white onion, diced
  • 2 cloves garlic, minced
  • 1 tablespoon coconut oil
  • 2 tablespoons cocoa powder
  • 2 tablespoons ancho chili powder
  • 2 chipotle chile peppers in adobo sauce, plus 1 teaspoon of the adobo sauce from the can (find canned chipotles in adobo in the Mexican section of your grocery store. Most canned have quite a few peppers, use a spoon to scoop out two)
  • 1 16-oz can of diced tomatoes
  • 1/8 teaspoon ground cumin
  • 1/8 teaspoon ground coriander
  • 1/8 teaspoon ground anise
  • 1/4 teaspoon ground black pepper
  • 1/2 teaspoon salt
  • Pinch ground cloves
  • 1/4 cup pepitas, plus more for garnish
  • 2 tablespoons sesame seeds
  • 2 tablespoons raisins
  • 1 cinnamon stick (about 2-3 inches long)
  • For serving: corn tortillas, cilantro, finely sliced red onion

  • Directions:

    1. In a skillet, or the bottom of you Instant Pot/Slow Cooker (set to the Sauté setting), heat coconut oil and sauté onion and garlic until onion is transparent. Turn off heat once onions are cooked.
    2. Transfer the onion mixture to a blender, and add cocoa, chili powder, chipotles and adobo sauce, canned tomatoes, cumin, coriander, anise, black pepper, salt, ground cloves, pepitas, sesame seeds, and raisins. Place lid on blender and purée until smooth.
    3. Place chicken in the bottom of your Instant Pot/Slow Cooker. Pour sauce over top, and add cinnamon stick. Place lid on pot and set to slow cook on “medium” for 6 hours or “high” for 4 hours.
    4. When timer goes off, cut chicken into bite-sized pieces (should fall apart easily) and serve in warm tortillas topped with fresh cilantro, red onion, and pepitas.

    2 Comments

    Grain-Free Sweet Potato Pancakes

    Grain-Free Sweet Potato Pancakes

    I have never tasted sweet potato pie 😧 but if sweet potato pie was put into a pancake, I imagine this is what it would taste like. 

    The batter for these pancakes is made of primarily mashed cooked sweet potato and egg. If you've ever made grain-free banana pancakes, you know what I'm talking about! The batter needs to be thinned out a little to make pancakes, so a bit of melted coconut oil and milk (whatever type you like) get stirred in. But then, ginger, cloves, cinnamon and a dash of salt are added -- this is where that pie flavor comes to life! These pancakes are grain-free, so expect the finish pancakes to be denser than traditional pancakes made with flour. 

    Cook the pancakes on a well-greased non-stick griddle, and serve them warm. We topped them with butter, maple syrup and a dollop of whipped cream. (Yes, whipped cream is allowed at breakfast, and it really completes the sweet potato pie effect!) 😋

    Perfect for the holiday season! 

    Grain-Free Sweet Potato Pancakes
    Grain-Free Sweet Potato Pancakes

    Grain-Free Sweet Potato Pancakes

    Published December 13, 2018 by
       Print This Recipe

    Yield: 6 four-inch pancakes   |    Active Time: 20 minutes


    Ingredients:

  • 1 cup cooked and mashed sweet potato
  • 2 eggs
  • 1/4 teaspoon ground nutmeg
  • 1 teaspoon ground cinnamon
  • 1/8 teaspoon salt
  • 1 teaspoon melted coconut oil, plus more for cooking
  • 1-2 teaspoon milk of choice
  • Optional: pinch of ground cloves
  • To serve: whipped cream, maple syrup, butter or coconut oil

  • Directions:

    1. In a medium sized mixing bowl, combine mashed sweet potato, eggs, nutmeg, cinnamon, salt, melted oil, milk, and cloves if using. Stir with a spatula or electric mixer until smooth.
    2. Heat a non-stick skillet over medium heat with 1-2 teaspoons of coconut oil. When the oil glistens, spoon batter into the pan by the 1/4 cup. This batter is thicker than traditional pancake batter, so use a spatula to spread it out to be about 1/4 to 1/2 inch thick. Cook for about 3-5 minutes, and then flip pancake and cook for 3-5 more minutes on the other side.
    3. Move cooked pancake to a plate and repeat step two until all of the batter is used.
    4. Serve warm topped with a pat of butter, dollop of whipped cream, and drizzle of maple syrup.

    Comment

    Grain-Free Mint Chocolate Brownies

    Grain-Free Mint Chocolate Brownies

    “These are a treat,” I said to Oliver after taking a bite. Fudgy on the bottom, creamy in the middle, and even more chocolatey on top, these brownies are rich all the way through.

    If you like York Patties, or Mint Chocolate Chip Ice Cream, or Andes Mints, these brownies are for you. And before I get to far… they are grain-free, gluten-free, and nut-free. Plus, they’re sweetened with honey!

    Mint and chocolate is a favorite combo of mine, and when I was day dreaming of holiday baking these stayed in the forefront of my mind. They feel super festive! It wasn’t until after I had made them that I was swiping through images of a cookbook my mom made of her favorite recipes and I found mint brownies nestled in there. Somewhere in the back of my mind I suppose I remembered her brownies…

    Grain-Free Mint Chocolate Brownies
    Grain-Free Mint Chocolate Brownies

    Let’s start at the bottom: the brownie base is made of the same batter used in these strawberry cheesecake swirled brownies. It is a very chocolatey, batter that calls for coconut flour and a LOT of cocoa. The result is one fudgy brownie!

    The next layer is a sweet mint cream cheese frosting. Most mint brownies call for buttercream here, but I’ve never been a fan of buttercream, and even as a kid I preferred cream cheese frosting. Nothing’s changed on that front! (For extra festive-ness, you can stir in a drop or two of green food coloring if you like.)

    The topping is a simple chocolate ganache, making a chocolate mint sandwich that even looks a bit like an Andes Mint!

    When you bite through all three layers it is rich, sweet and melt-in-your-mouth delicious… a total treat! (One night we had these with the Mint Chip Ice Cream from CoolHaus. 😍)

    Grain-Free Mint Chocolate Brownies

    Grain-Free Mint Chocolate Brownies

    Published December 6, 2018 by
       Print This Recipe

    Serves: 16   |    Active Time: 1 hour


    Ingredients:

    Brownie Base:
  • 1/2 cup melted unsalted butter or coconut oil
  • 1/2 cup cocoa powder
  • 1/3 cup semi-sweet chocolate chips
  • 1/4 cup honey
  • 2 eggs, room temperature
  • 1 teaspoon vanilla extract
  • 1/4 cup coconut flour
  • 1/4 teaspoon salt

  • Mint Filling:
  • 8 ounces cream cheese, room temperature
  • 1/4 cup honey
  • 1/4 teaspoon peppermint extract

  • Chocolate Ganache Topping:
  • 2 tablespoons unsalted butter or coconut oil
  • 2 tablespoons half-and-half
  • 1/2 cup semi-sweet chocolate chips

  • Directions:

    1. Preheat oven to 350°F and line a 8x8 baking dish with parchment paper.
    2. In a small sauce pan, combine melted butter or coconut oil, cocoa powder, and chocolate. Heat over low heat, stirring until most of the clumps have melted. Remove from heat and allow to sit until entire mixture is smooth and melted.
    3. Scrape mixture into a mixing bowl. Using electric beaters, stir in honey. Add eggs and vanilla and beat again. Mixture should begin to thicken. Add coconut flour and salt. Beat until smooth and no clumps remain.
    4. Spread batter in even layer in prepared baking dish.
    5. Bake for 20 minutes, until brownies are slightly puffy, and a knife comes out clean when inserted in the middle. Allow to cool for completely before topping with mint filling.
    6. Mint filling: while brownies are cooling, beat together cream cheese, honey, and mint until smooth. When brownies are no longer warm to the touch, spread cream cheese mixture over top in an even layer. Place brownies in fridge, covered, for at least one hour (or overnight! Short cutting this time will make it hard to spread the ganache over top and get clean layers.)
    7. Chocolate ganache topping: Place butter, half-and-half, and chocolate in a small sauce pan and heat over low heat, stirring constantly, until a smooth ganache is formed. Remove from heat. Spread chocolate ganache over cream cheese mixture and allow to set 10 minutes before slicing into 9-16 squares. Tip: for the cleanest cuts, rinse your knife between each slice.

    Comment